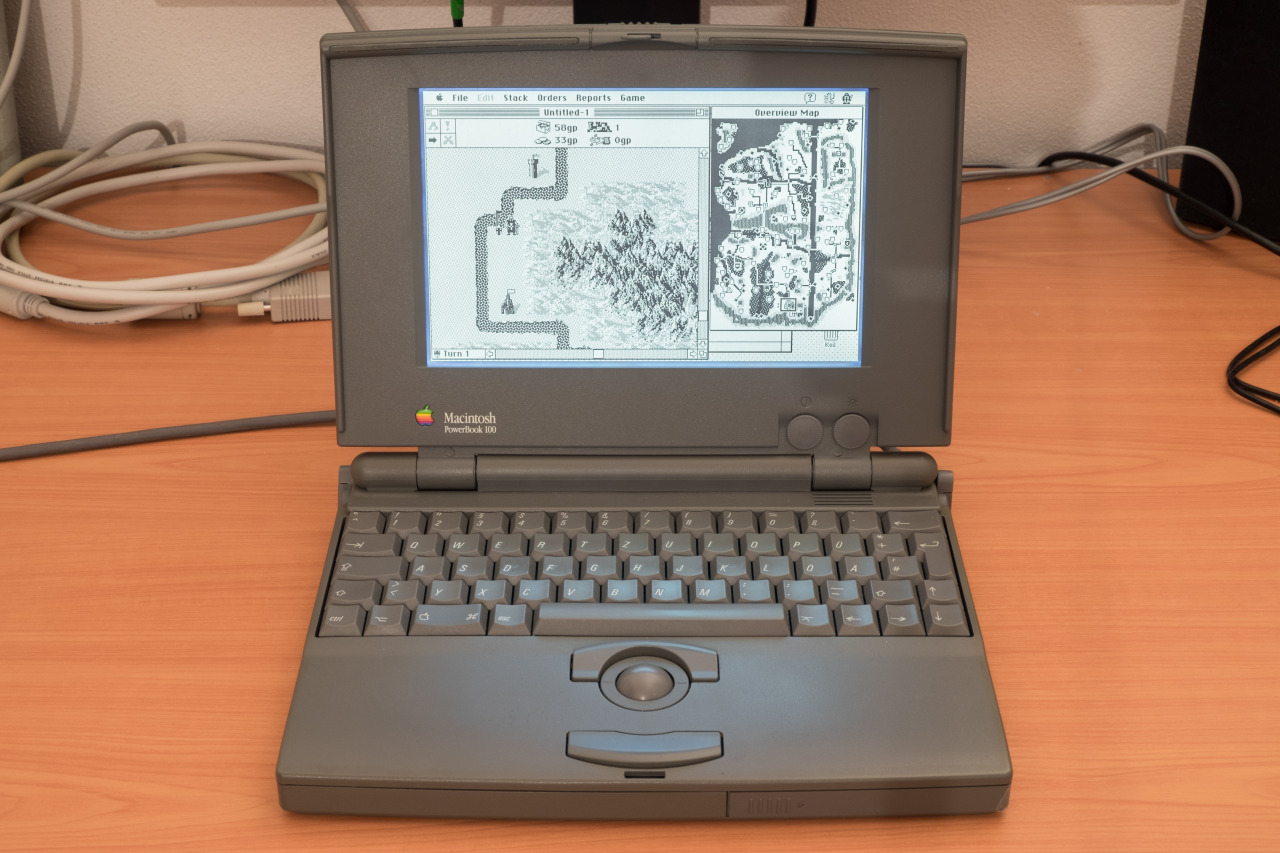
Games on early B&W Macs traded colors for a higher resolution and they often looked very good. However, this was difficult to do in Warlords, a turn-based strategy game with eight nations, where the color was the only way to differentiate between them. The Mac version has unique graphics for buildings and flags (held by warriors) to overcome the lack of colors and the result is surprisingly nice, but the colors on PC are more practical anyway.
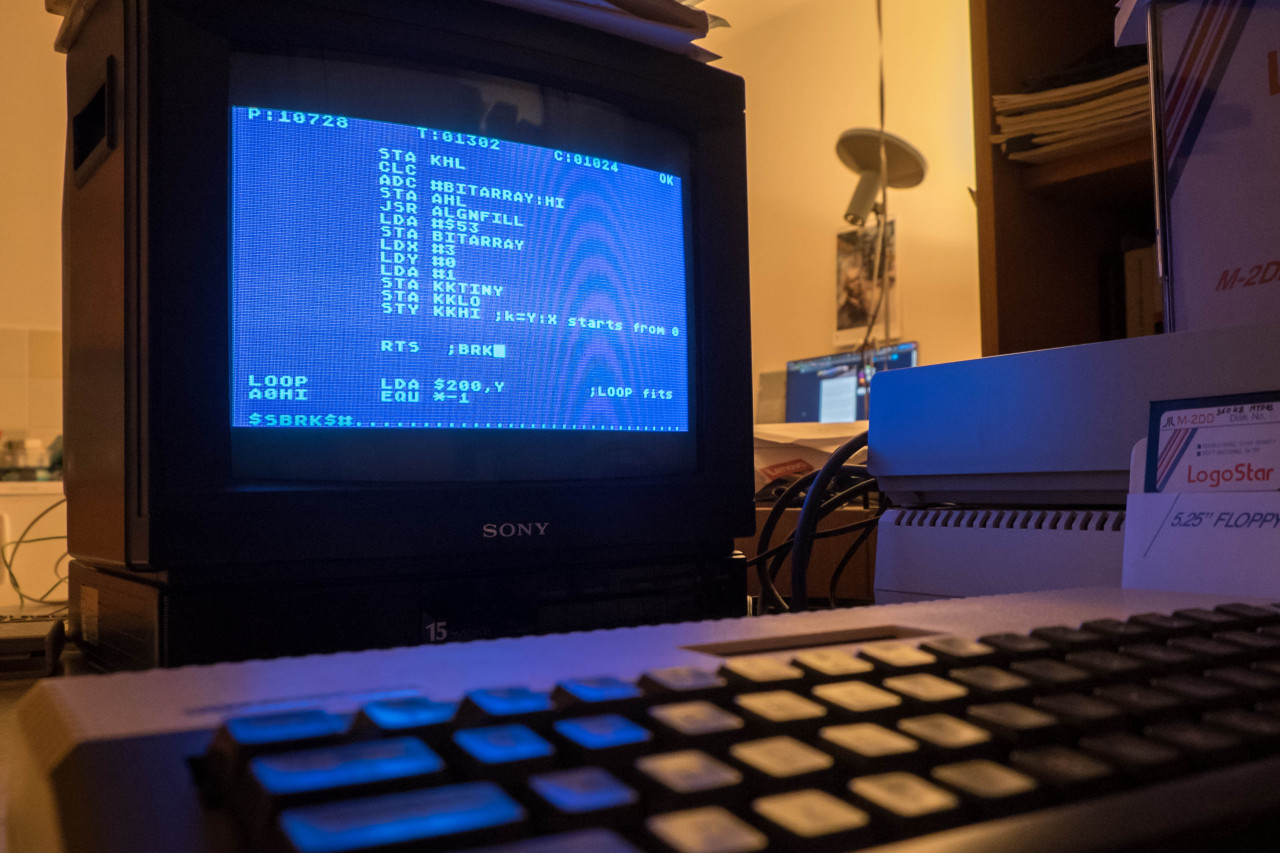
I was silent for a while as some things required my attention more than old computers. We extended the list of implementations of our Sieve Benchmark and it now supports even 6502. It was developed on Atari 800XL without any modern hardware or software (it’s written in ATMAS II macro-assembler). And it was a pain.
We all remember the lovely days of being young and playing with these simple computers, where programming was often the best way to spend time. These nostalgic memories don’t say the truth how horribly inefficient the development was on these machines in comparison with what came a decade later. David told me that his productivity was about 20 times lower in comparison with developing an assembly program of similar complexity and size on PC. These were one of the biggest reasons for your entertainment:
It was easy to fill whole available memory with the source code text. There was a situation when only 100 characters could be added to the text buffer, but about 2000 were needed. That caused that multiple parts were optimized for source code length (except, of course, the sieve routine itself, which was optimized for speed).
At the end, it was necessary to split the source code into two parts anyway.
Unlike with PCs, the Atari keyboard doesn’t support roll-over on standard keys. It is necessary to release the key before pressing another one (otherwise the key-press is not properly recognized).
Having a disk drive was a big advantage over tapes. However, the implementation on Atari was very slow and everything took incredible amount of time. Boot into editor? 20 seconds. Loading the first part of the source code? 5 seconds. Loading the second part? 30 seconds. Storing it back? 60 seconds (for just 17 KB). You needed about 160 seconds before trying to run the program after every larger change (including 20 seconds for compiling). Often a minute more if the program crashed the whole computer.
Although David never started to use “modern” features like syntax highlighting and code completion and he still programs mostly in the 80×25 text-mode, he said that this was too much for him so I don’t think we will repeat this again soon.
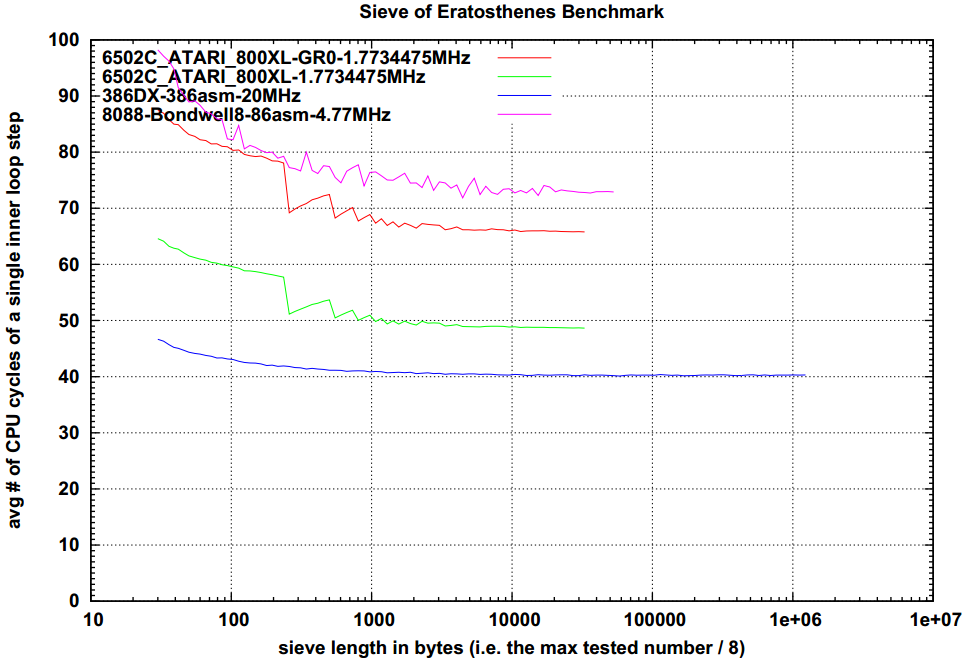
Regarding the results: A 1.77-MHz MOS 6502 in Atari 800XL/XE (PAL) required about 66 CPU cycles to go through a single inner-loop step. If graphics output was disabled during the test, this decreased to just 49 CPU cycles. A 4.77-MHz Intel 8088 needed about 73 CPU cycles to do the same. Thus, 6502 is faster if running on the same clock.
On the other side, the original IBM PC is clocked 2.7x higher than the Atari and 4.7x higher than other important 6502 machines (Apple IIe, Commodore 64). Thus, IBM PC was at least twice as fast in this type of tasks (similar to compiling, XML parsing…). I’m not surprised, but it is nice to see the numbers.
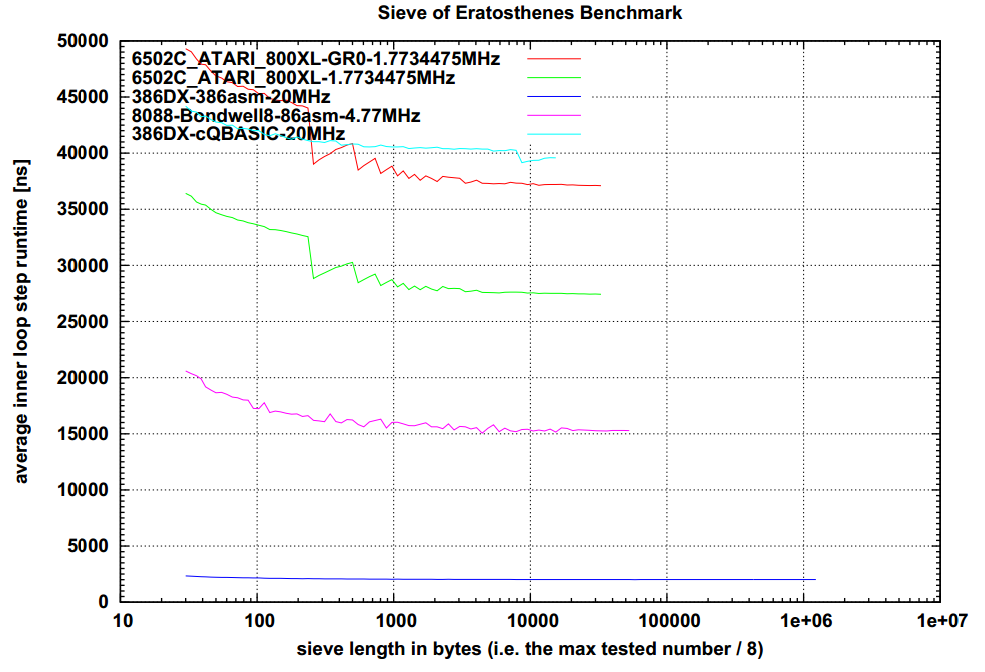
Interestingly, the heavily optimized assembly code running on Atari provides the same performance as compiled BASIC (MS QuickBasic 4.5) running on 20MHz 386DX (interpreted version would be three times slower). This was one of the fastest BASICs out there so it gives you good perspective on how these high-level languages killed the performance back then. David spent a lot of time optimizing the code for both CPUs and used the available tricks for each architecture (like self-modifying code…). If you feel that your favorite CPU should have been faster, you can download the project folder and check the source code. If you create a faster version, please send it to me (but please read the README first, especially the part called “Allowed tricks”).
Also if somebody is able to port the code to Commodore 64, it would be nice to compare the results with Atari (only the disk access, timer and console input/output need to be rewritten). Any expert/volunteer?
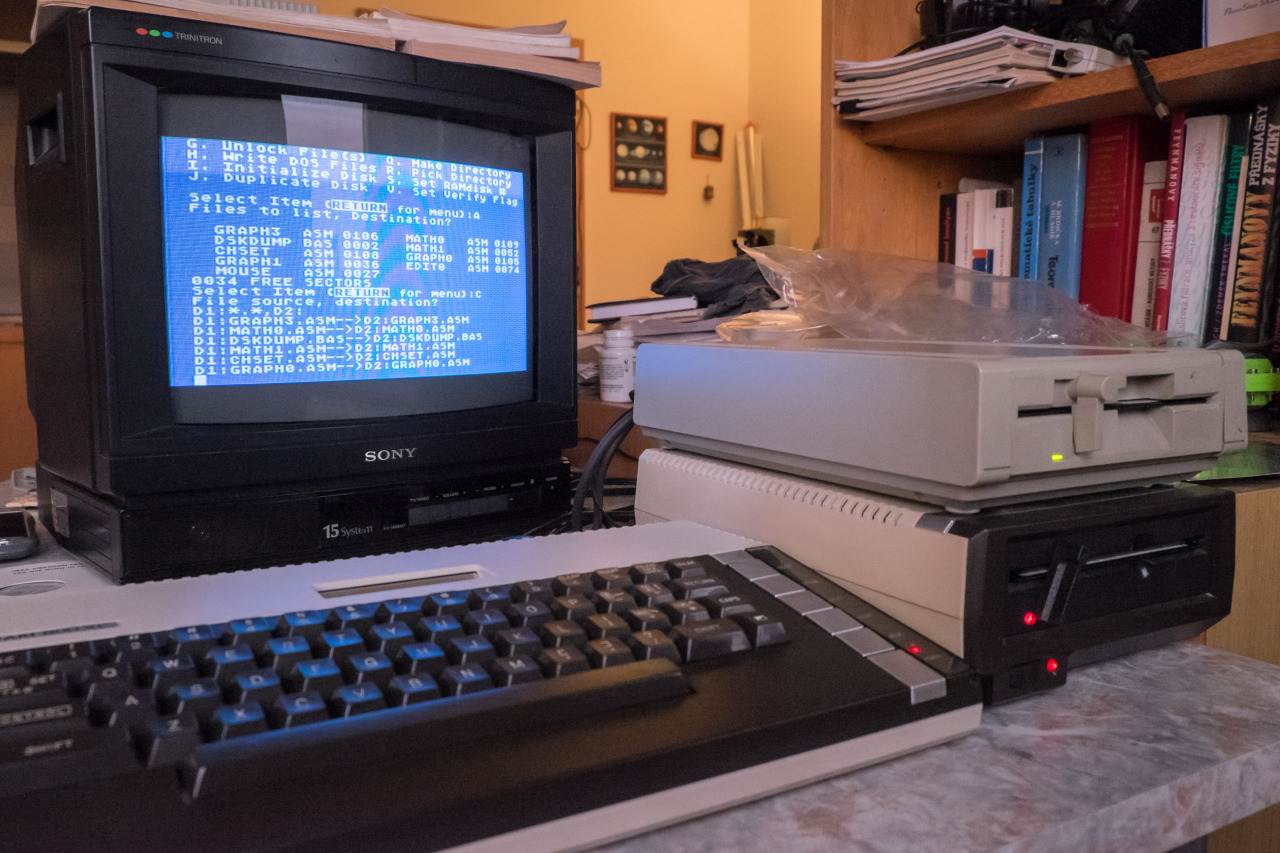
David asked me if I could help him with transferring all files from the pack of floppy disks he used during the late 80s with an 8-bit Atari (800XE). We are working on the Atari version of our Sieve Benchmark (to compare the performance of old computers) and he told me that, as a kid, he created many assembly programs that can now speed up the development . The ultimate goal is to compare extremely optimized assembly versions of the benchmark for 6502, Z80 and 8088 to find out, which CPU is faster.
I didn’t have any modern disk emulator for the system so I transferred the files to the PC the old way. I used Atari 800XL and two floppy drives (1050 and XF551). At the beginning, I had just one drive, but then I realized that I was not able to create at least a small RAM disk on a 64k machine with MyDOS – that would allow me to copy files from one disk to another without using multiple drives (this is not straightforward when each of the disks has different density).
Copying files to different disks was necessary. David used the 130KB “ehnanced density” format that is not readable on floppy drives in PC. The Atari XF551 disk drive supports all the Atari formats up to the 360KB double-sided double density that is sort of compatible with PC drives. With the two drives connected to the Atari, I copied the files from the old disks to a few “new” ones and started searching what is necessary to do on the PC side.
At the end, I used two MS-DOS programs – ATUTIL for reading/writing individual files and WRITEATR for creating ATR disk images out of real floppies. All of this took me two evenings, but I’m happy that I didn’t have to use modern hardware to copy files both ways between 8-bit Atari and PC.
(btw David also decided not to use modern hardware so he is programming directly on the Atari 800XL with Atmas II macro assembler from 1985)
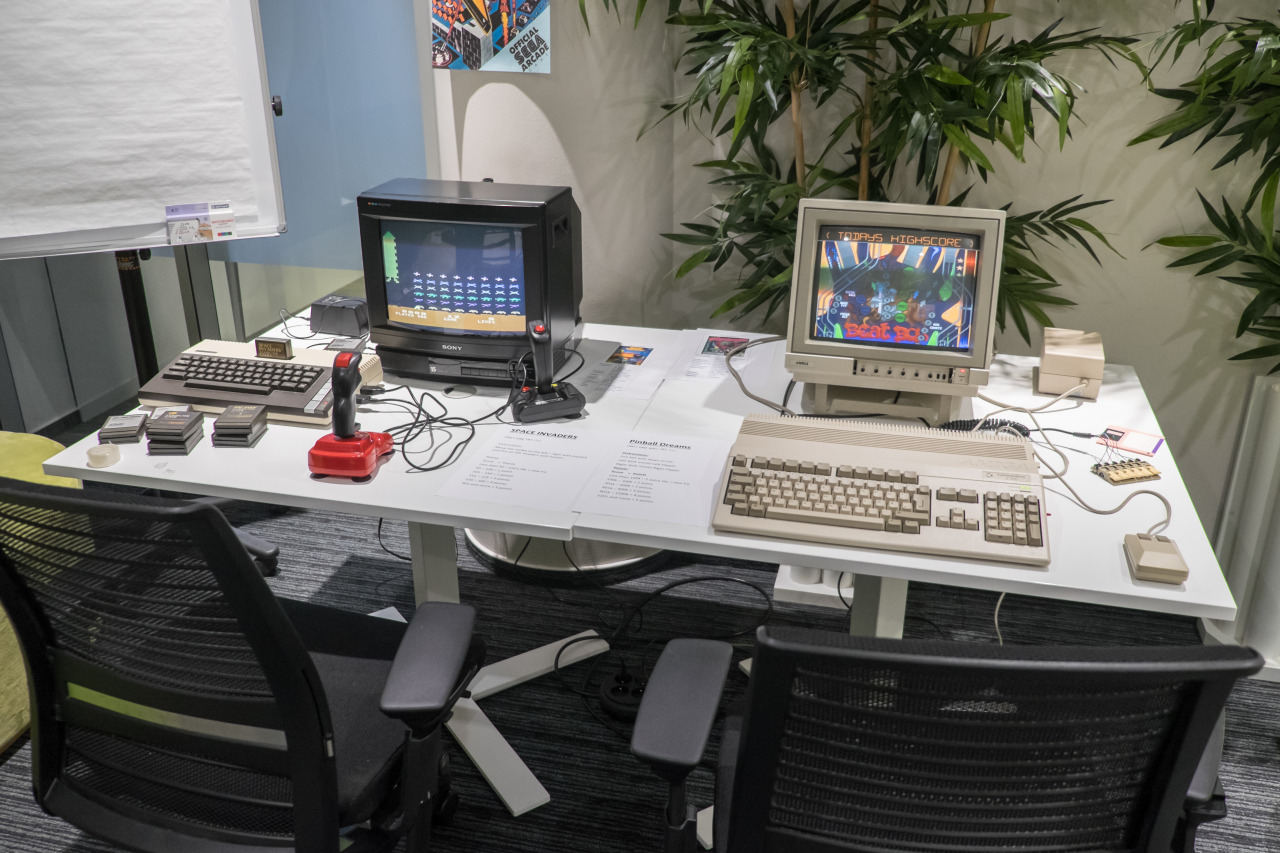
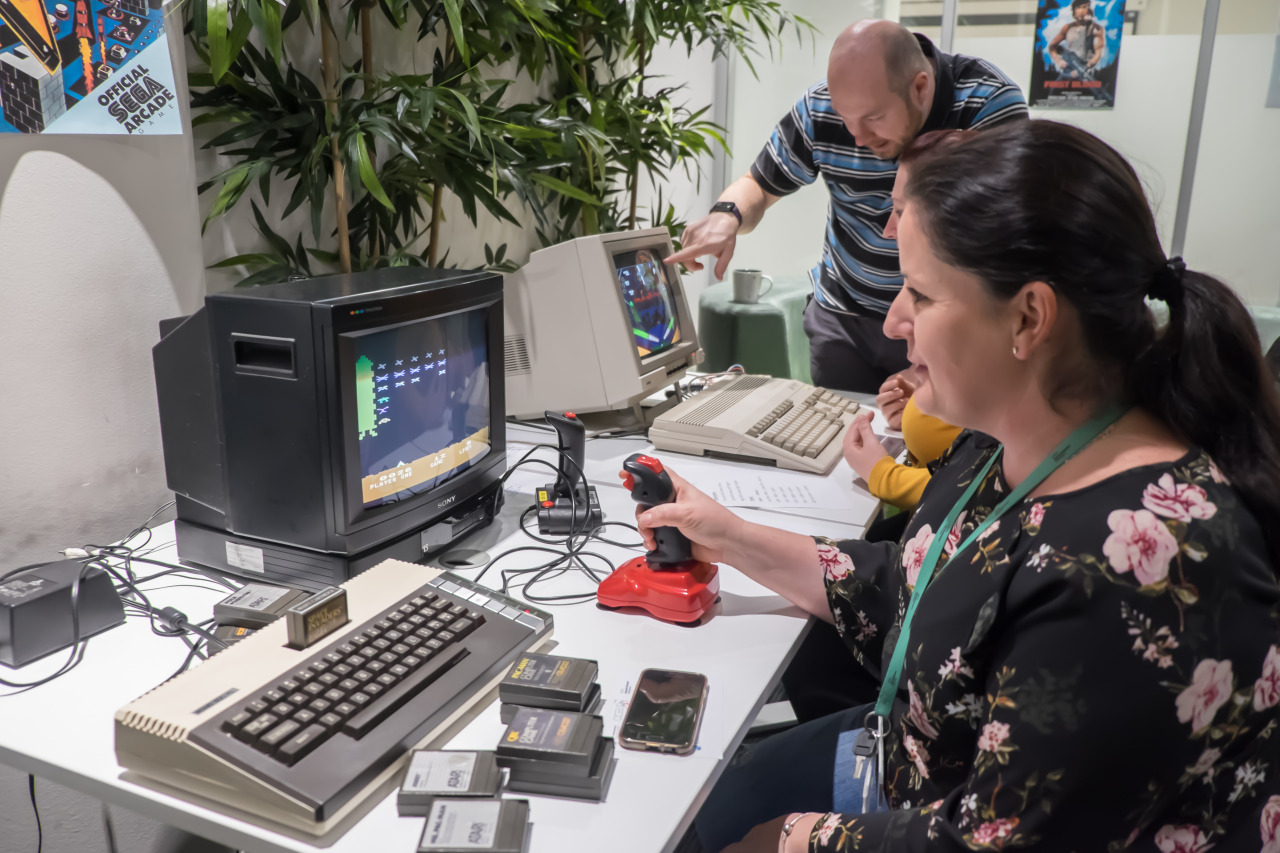
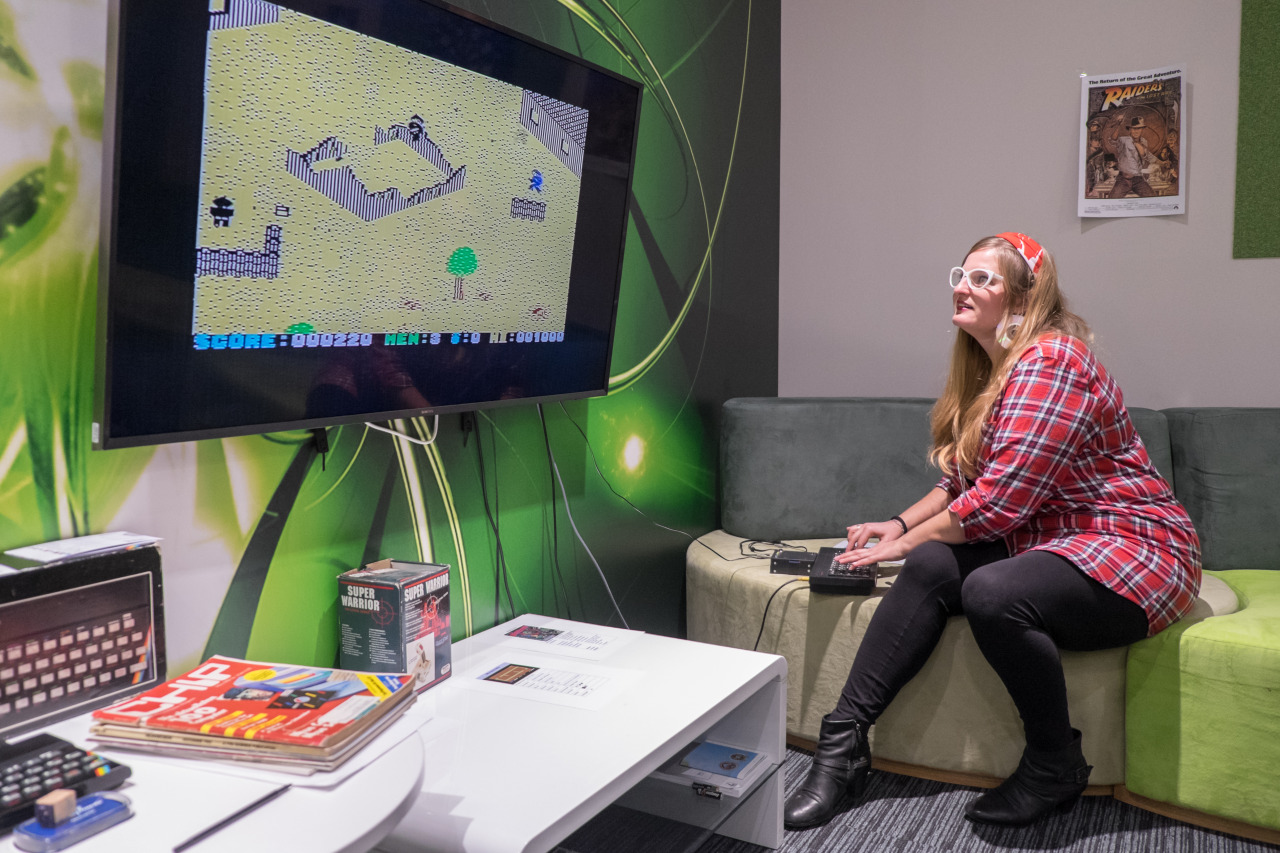
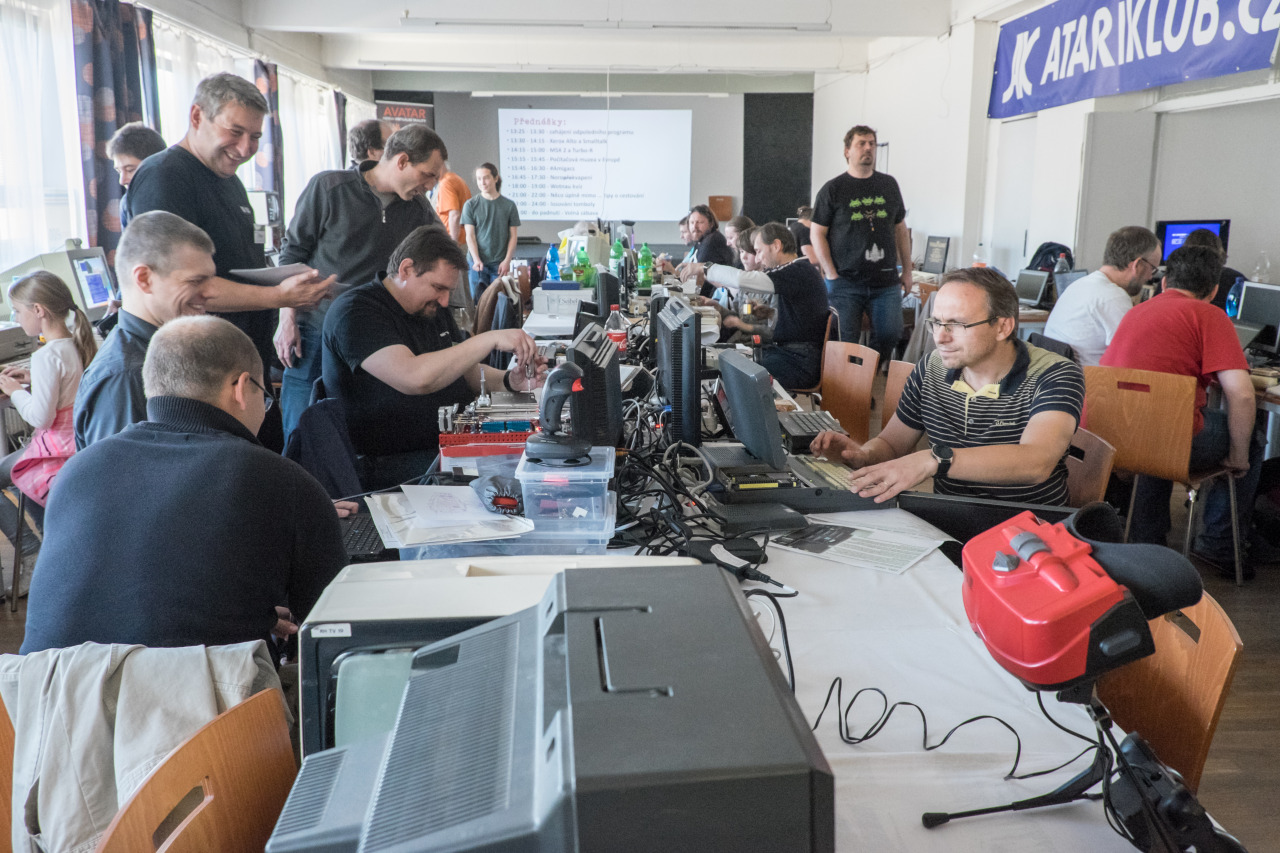
We prepared a small room with old computers as a part of a bigger event at work. After careful consideration, we selected Atari 800XL and Commodore Amiga 500 for the contest purposes. Atari was running Space Invaders and each visitor played with the highest difficulty (three lives, level 12). For Amiga, we chose Pinball Dreams and the goal was to get the highest score using just a single ball.
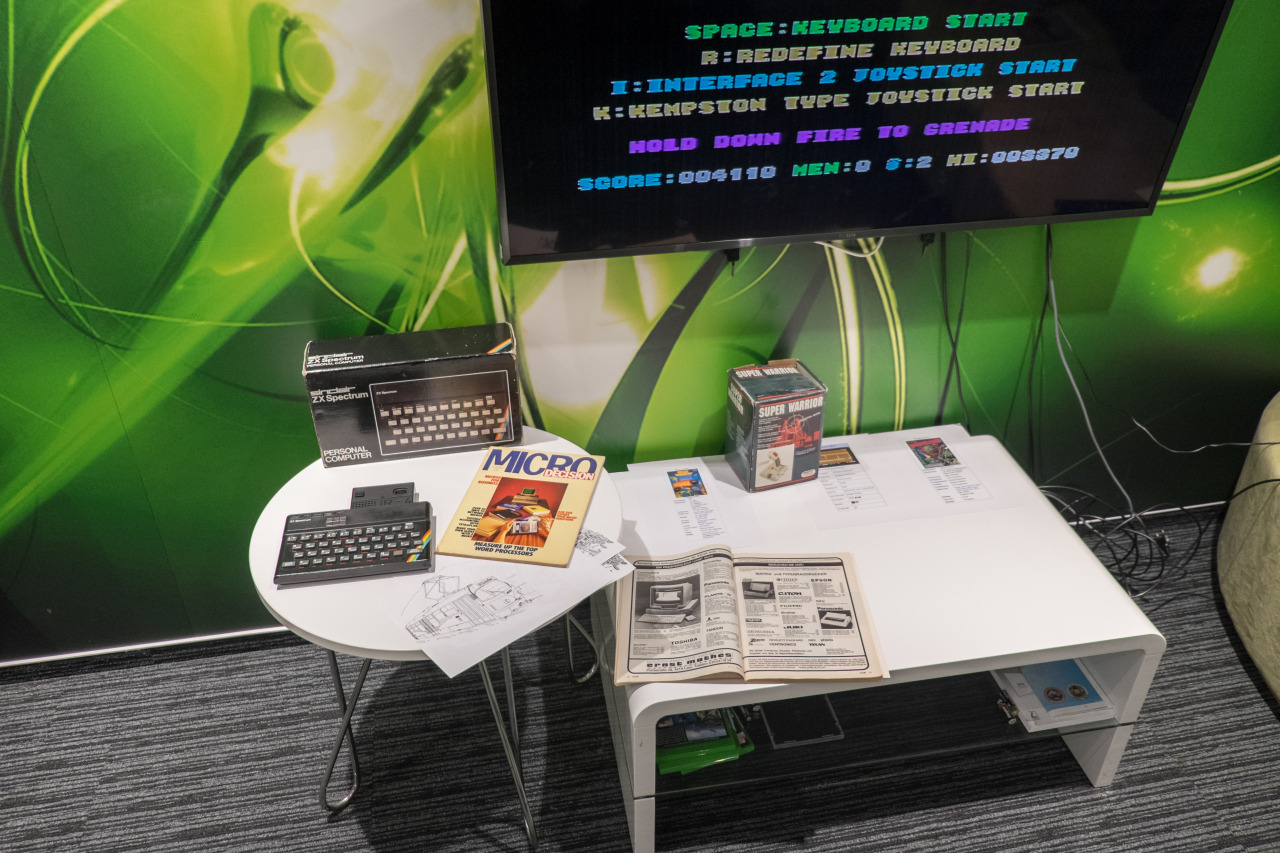
To make the room more appealing, we brought several old computer magazines and 80s props. Curious visitors could also experience ZX Spectrum+ with the Who Dares Wins game. The feedback on our room was very positive and people were talking a lot about their first computers there. However, the biggest surprise for me is that the joystick survived all the players. Some of them gave it a hard time.
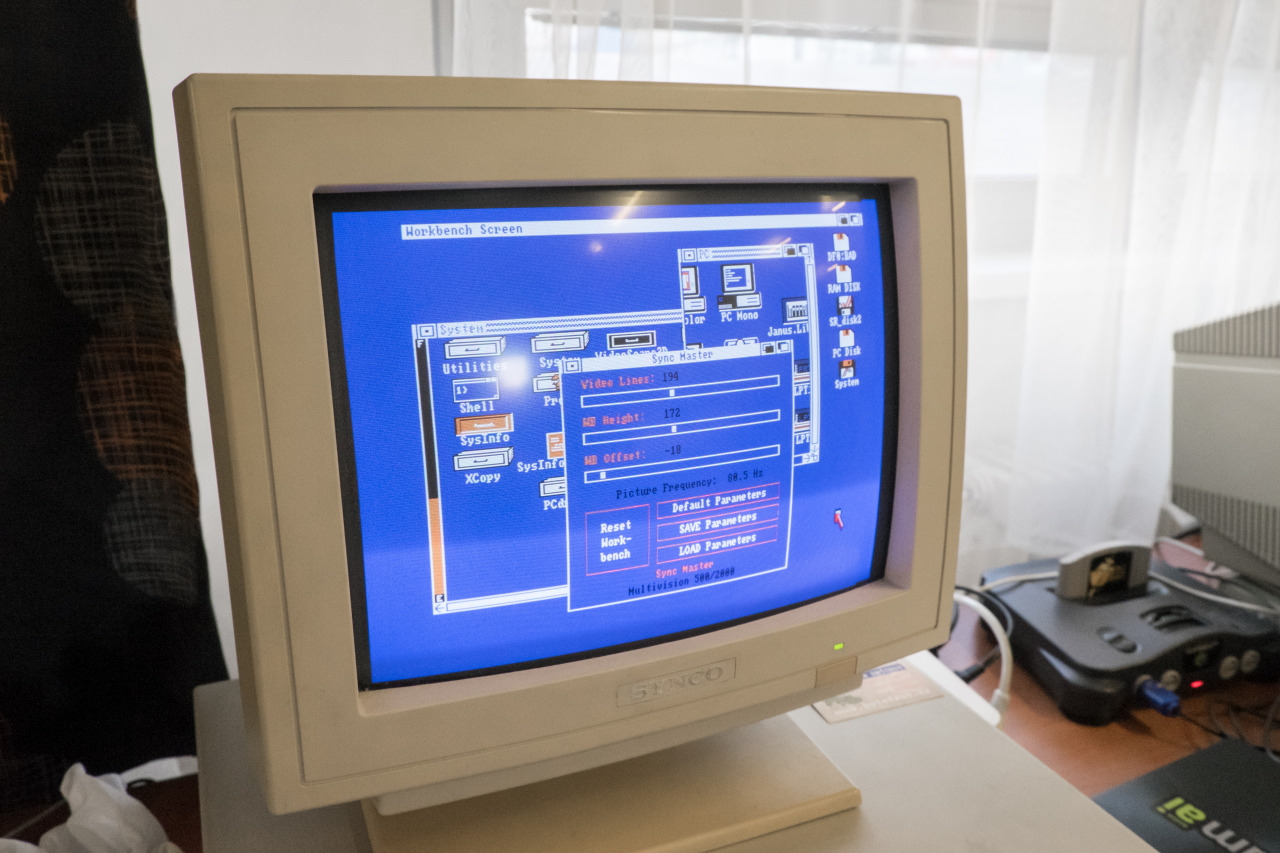
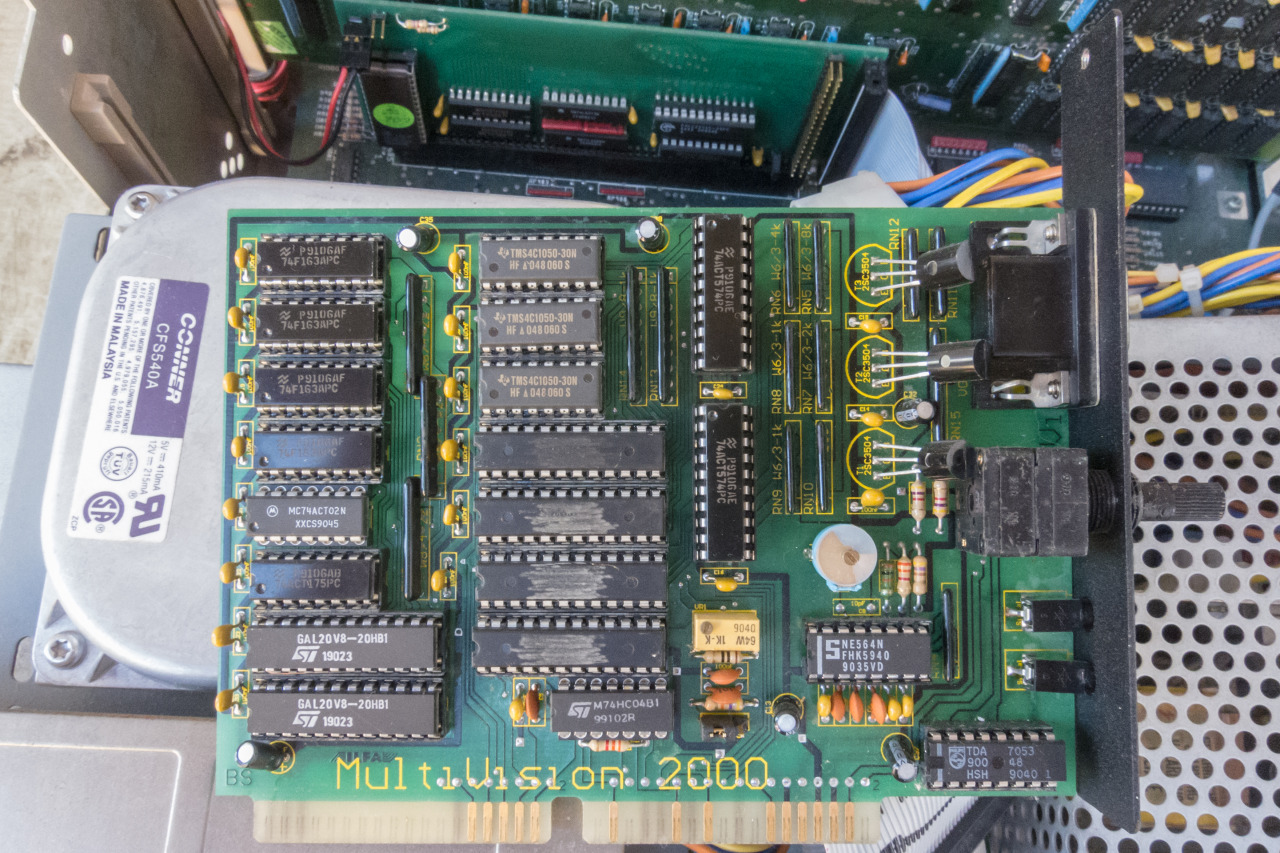
Working with old Amiga computers with their original color monitors is always a painful experience. Especially here in Europe where these screens run at 50Hz. Fortunately, my Amiga 2000 is equipped with a Multivision 2000 scan-doubler card that not only doubles H-sync from 15.75kHz to 31.5kHz (to make the output compatible with VGA monitors) but it also allows a user to increase refresh rates up to 100Hz.
I wanted to show this computer on Bytefest (a vintage computer show) and I decided to show it with a CRT (LCDs always ruin the experience). That created an ideal situation to check how this “software controllable refresh rates” feature works. The manufacturer of the card (3-State) bundled a diskette with a simple program that allows you to find the optimum refresh rate using multiple sliders and the way it works is compatible even with old simple VGA screens from the early 1990s.
The picture frequency is increased when a user decreases the number of video lines. Speed of drawing of each line is still the same. The computer just generates fewer lines, which means that a single frame takes less time and the next one can start sooner.
I switched Workbench into the interlaced mode (512 lines instead of 256) and then used the bundled Sync Master tool to decrease the number of lines close to the original non-interlaced resolution. As a result, I got nice and steady 80Hz on a standard VGA screen, which allowed me to work with the computer for hours without eye strain. This is a perfect setup for office/productivity work. However, be prepared that this tool doesn’t work well with applications that open their own screens a display outside Workbench (you need to revert it to default before starting such application).
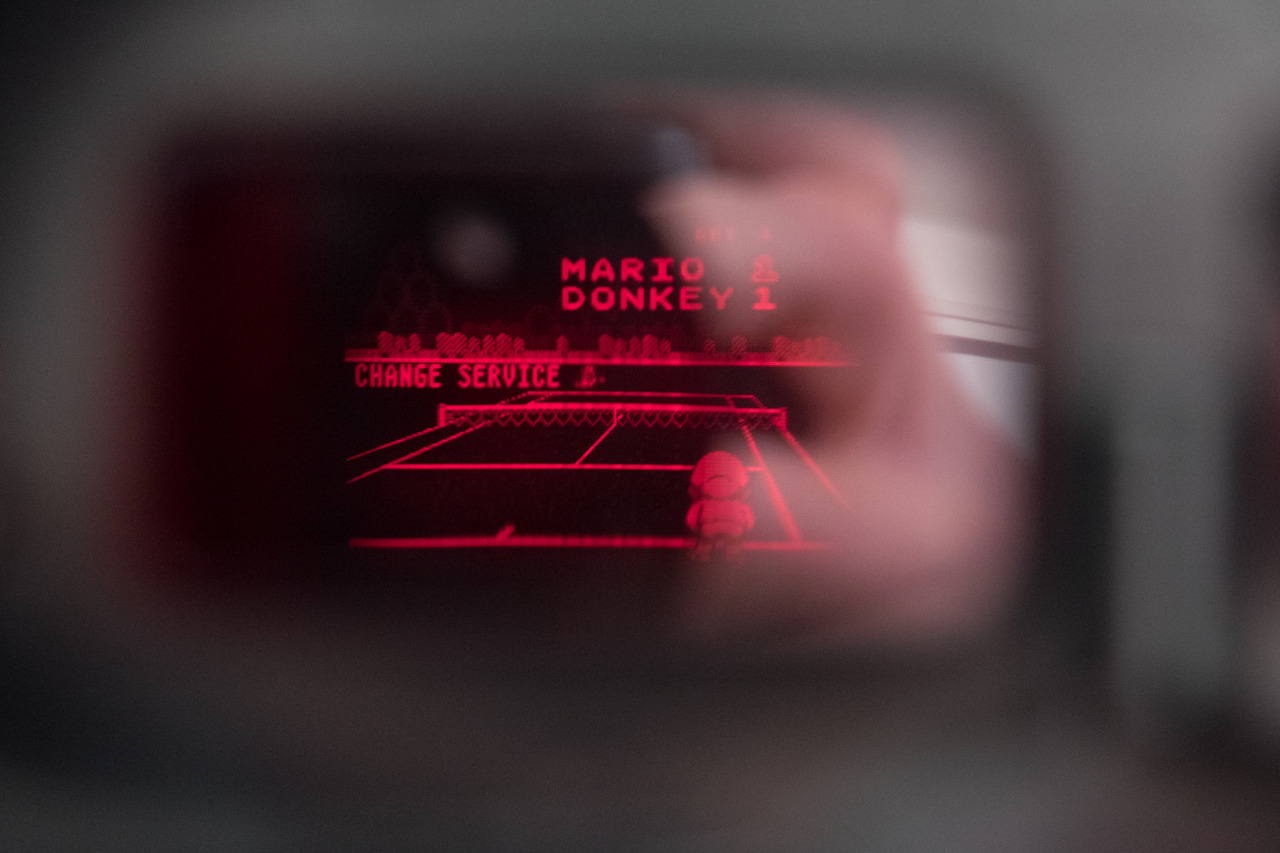
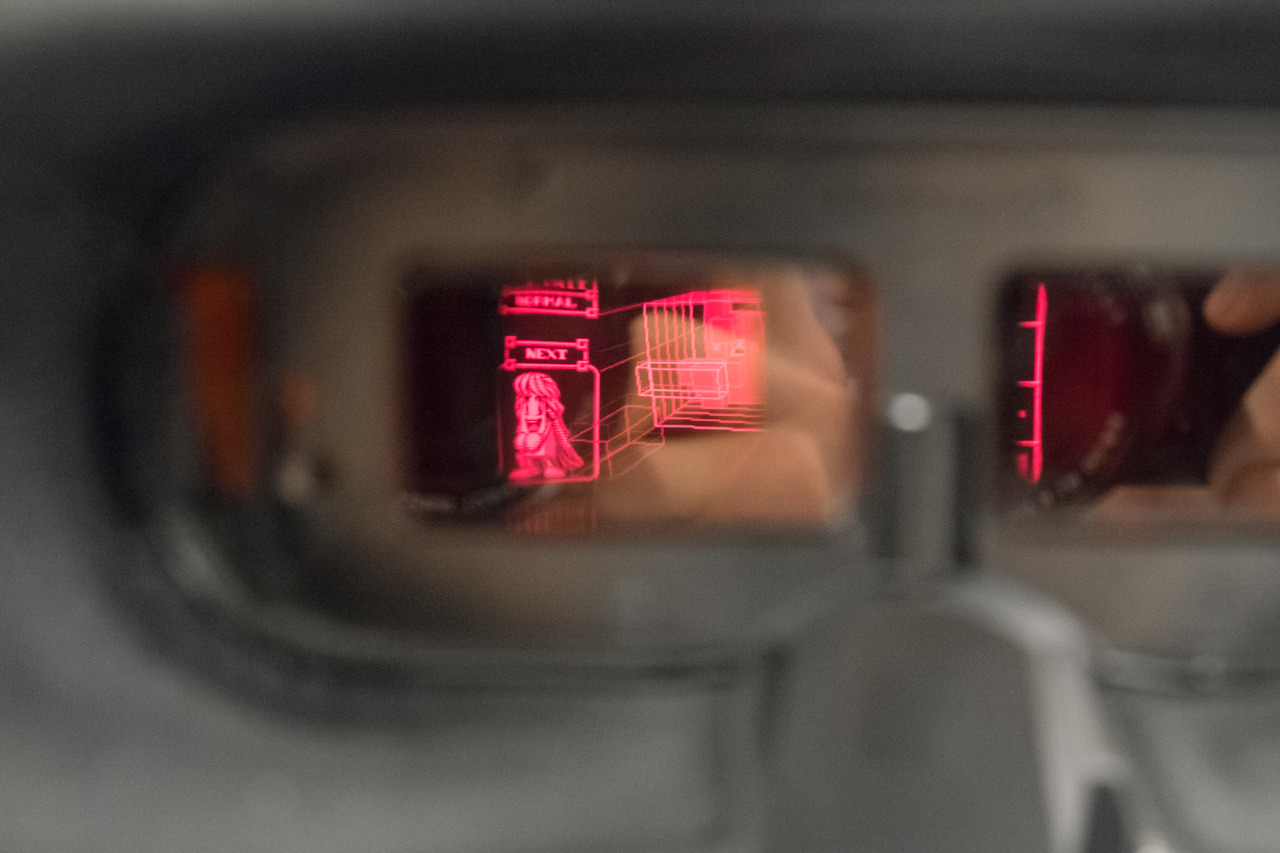
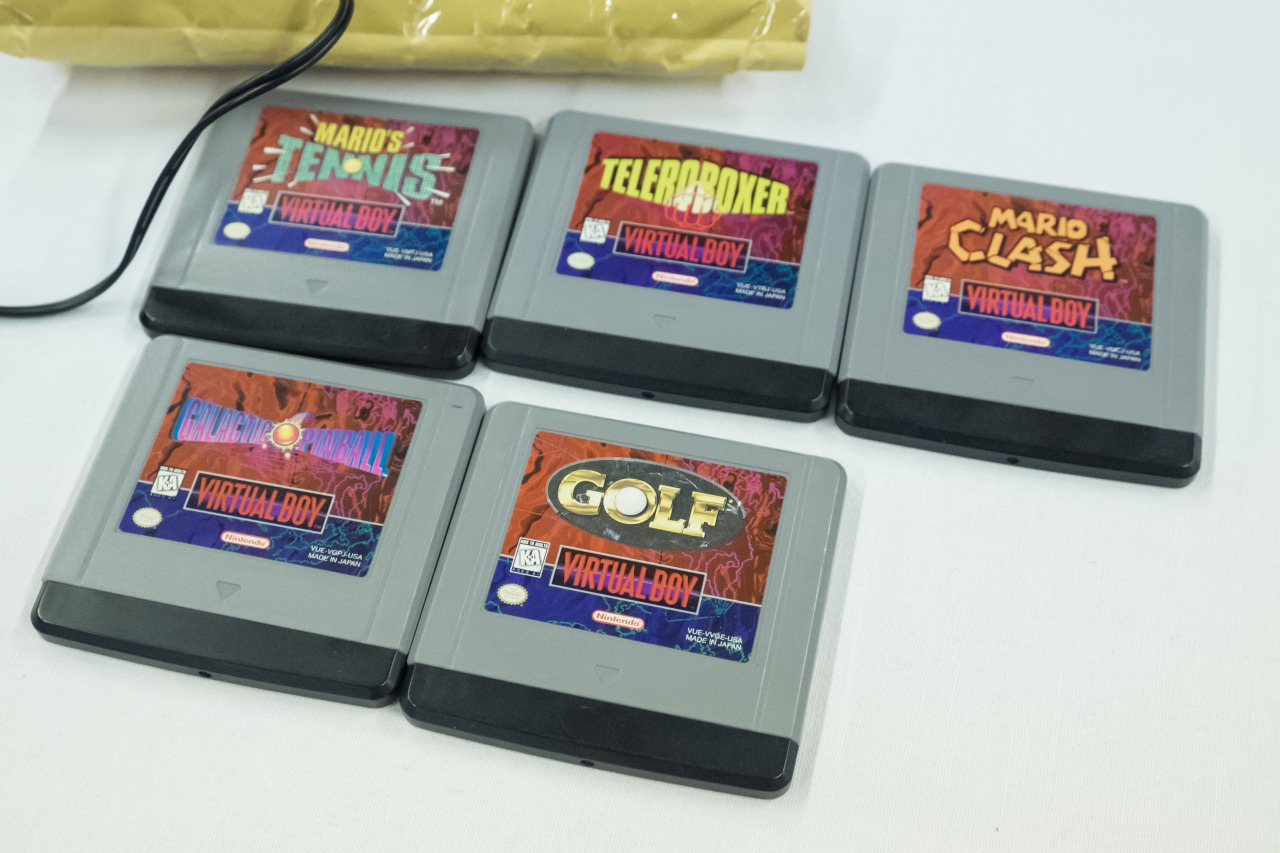
Virtual Boy was the coolest thing I saw this year during the Bytefest vintage computer show. I knew that this was a commercial failure and expected the worst. However, it was fun to play some of the games and I quite liked the red LED displays. The 3D effect was clearly visible and I didn’t experience headaches from the displays even after nearly an hour of playing.
The only drawback was the mechanical stand that required me to lean forward too much and my (already damaged enough) cervical spine suffered from it. Anyway, I’m happy that I had the opportunity to finally experience this device. I wasn’t expecting to ever see it in our small country.
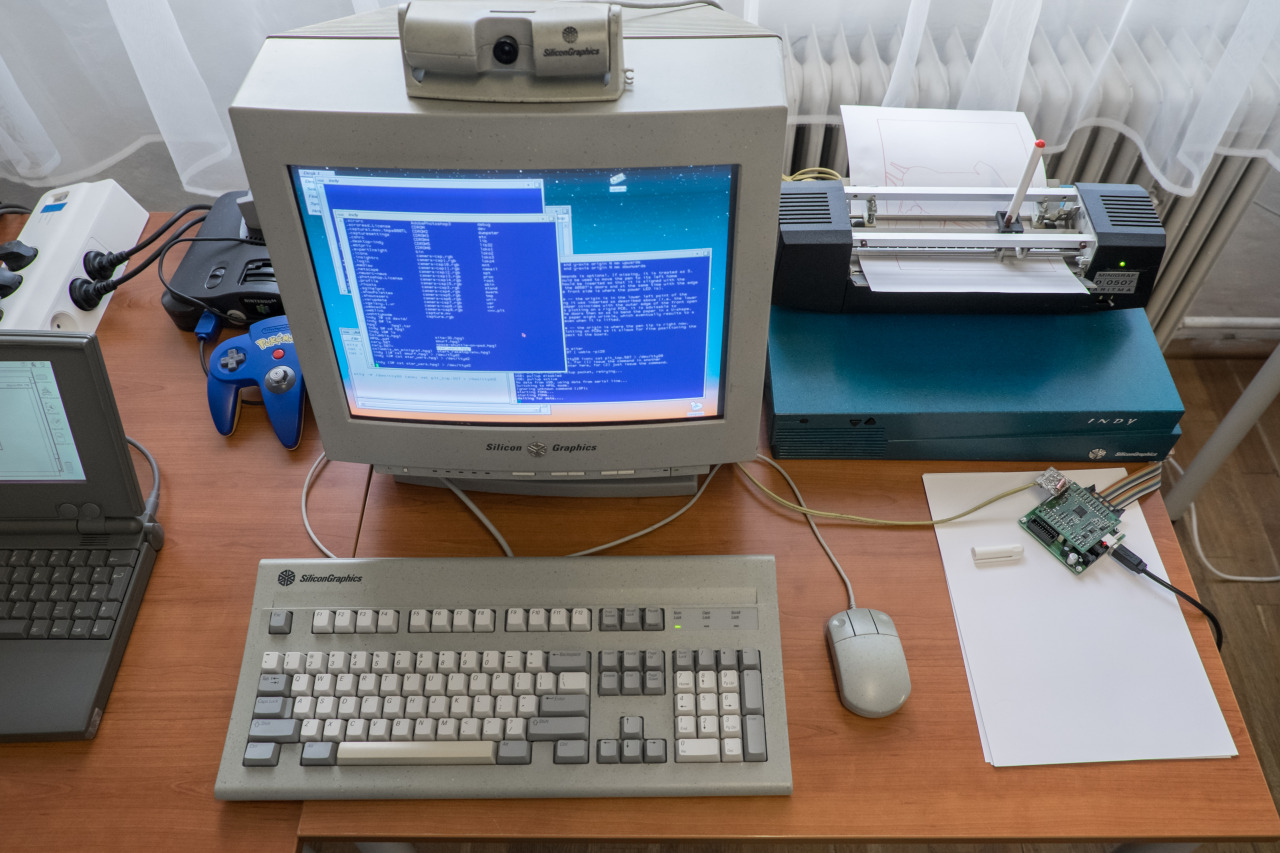
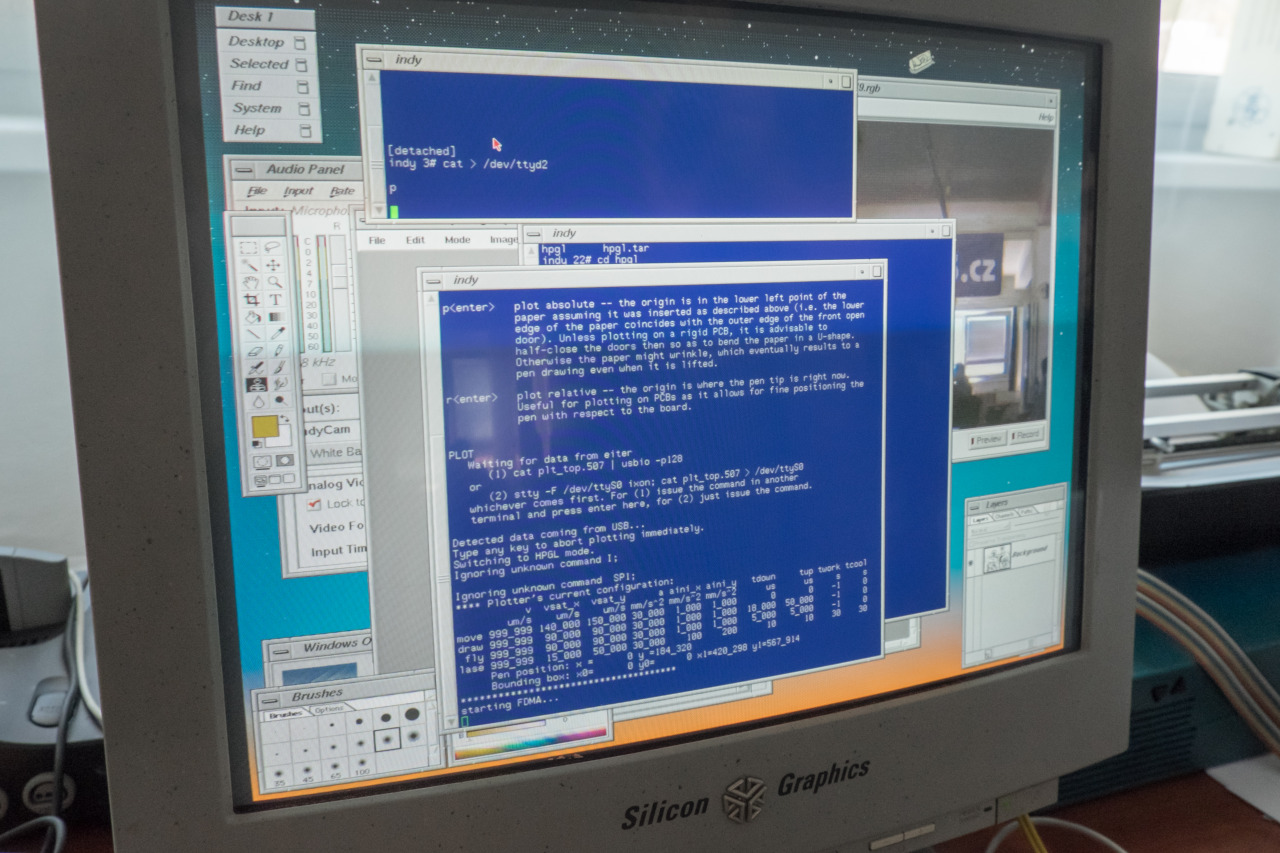
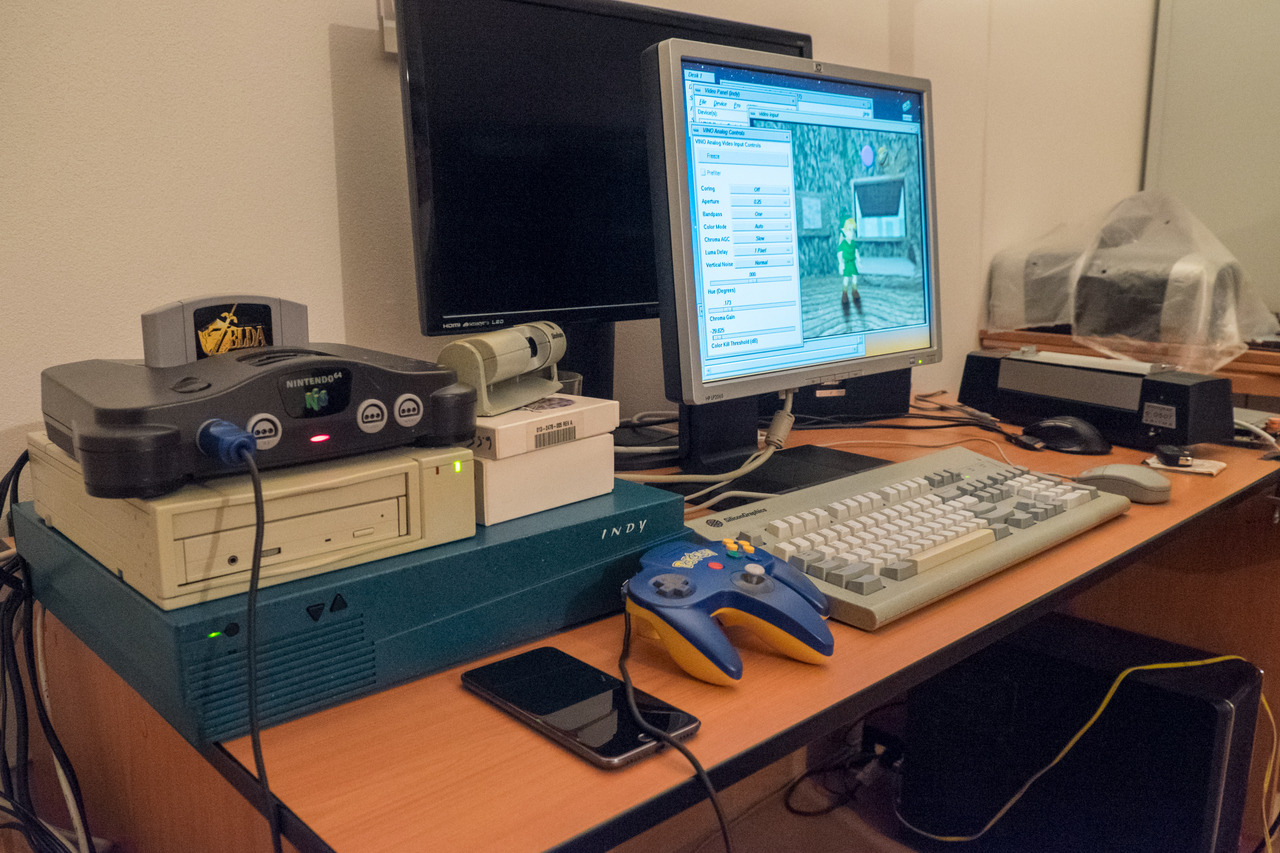
These were the computers we brought to Bytefest – a Czech vintage computer show. David and I decided not to bring more than two desktop systems. Amiga 2000 was an obvious choice – we fixed it not a long time ago and I played a lot with it recently. The other computer was SGI Indy with the original set of peripherals including the Indycam camera. There are not many vintage UNIX computers to see on vintage computer shows in this country. Thus, it is my duty to bring at least one every year.
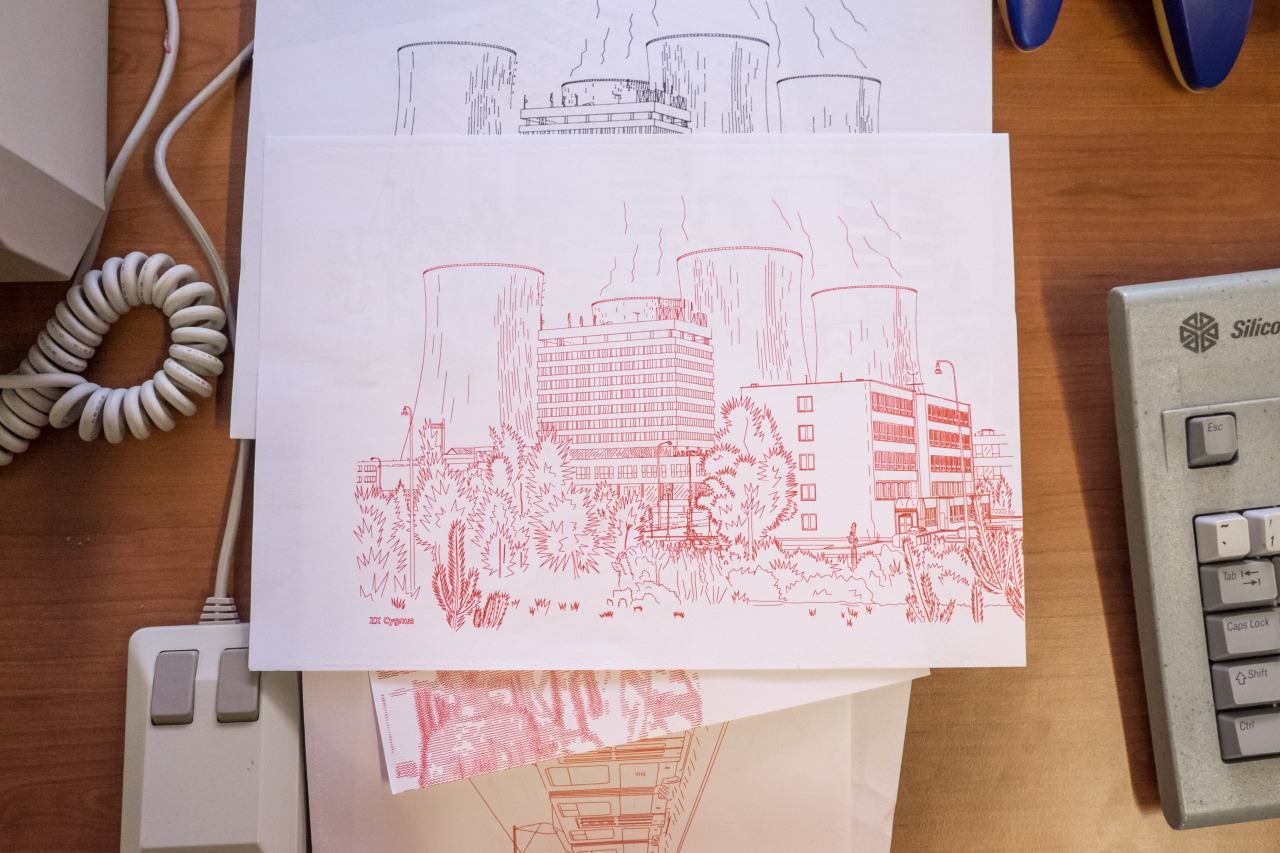
The Aritma Minigraf plotter sitting on top of the Indy was connected using one of the Indy’s serial ports though a special ARM-based module that David built. The module contained the control software that allowed it to draw faster and with better precision than the plotter was originally designed for. From time to time, there were couple of people standing in front of the plotter, being hypnotized by the smooth movement of the pen. The Indy itself was communicating with the module as a serial terminal with the ability to send HPGL files that needed to be drawn.
I’d never played that much with Indy before (aside creating the OpenGL 1.0 version of our 3D graphics benchmark) and this was a nice experience. The graphics card in our Indy is able to display no more than 256 colors (or 16 colors for double-buffered 3D), but it’s pretty fast and allows you to have a different 256-color palette for an active window and the rest of the system. Therefore, the color flickering effects are minimized in comparison with PCs set to 256-color modes. I was surprised by the visual quality of the composite input from Nintendo 64 in 256 colors.
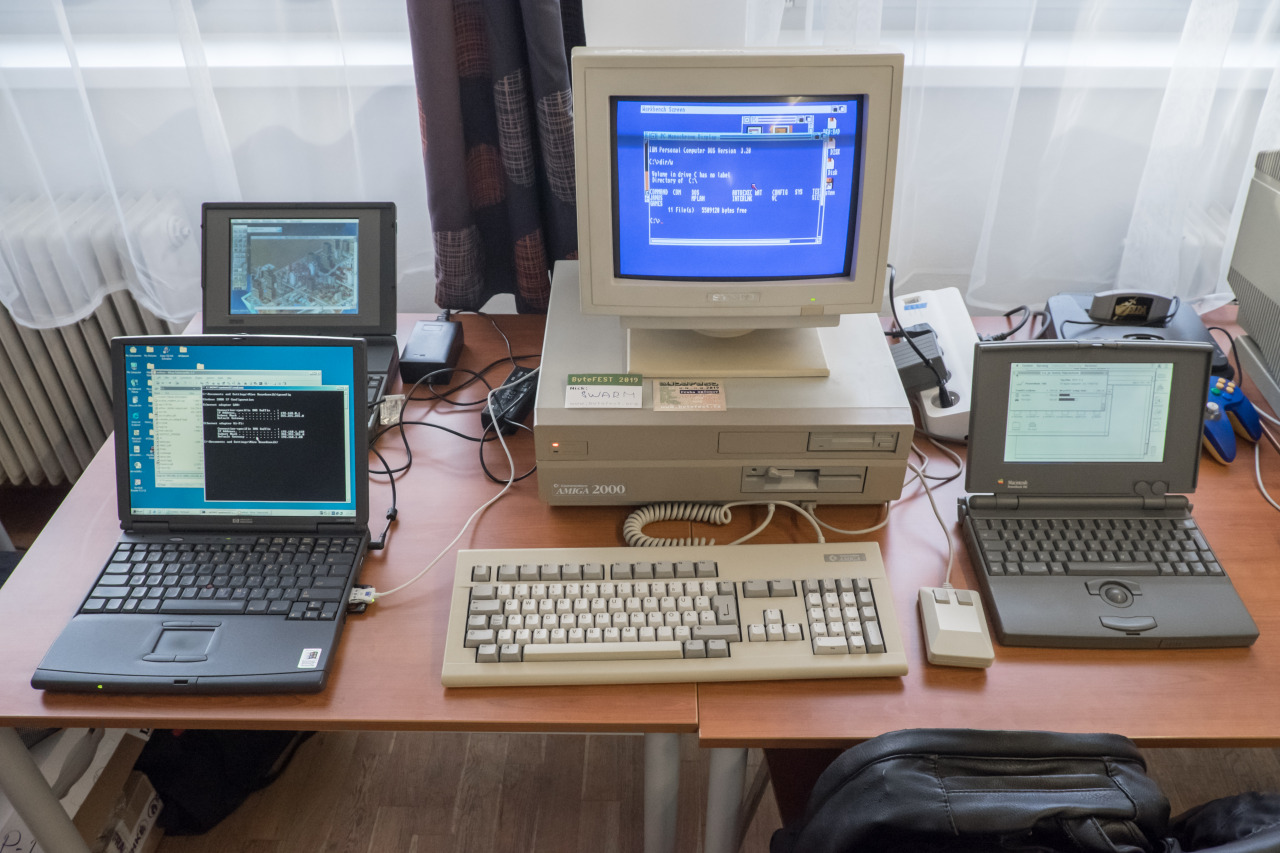
Commodore Amiga 2000 was configured to show the capability of this platform during the late 80s (thus, Workbench 1.3 and Kickstart 1.3 only). It didn’t have any accelerator board and the only expansions were a simple hard disk controller, 2-MB fast RAM card and A2088XT PC emulator (with an 8088 and 512kB of RAM). During the show, I also added an ISA card with a serial port (for Microsoft InterLink purposes) and a VGA adapter.
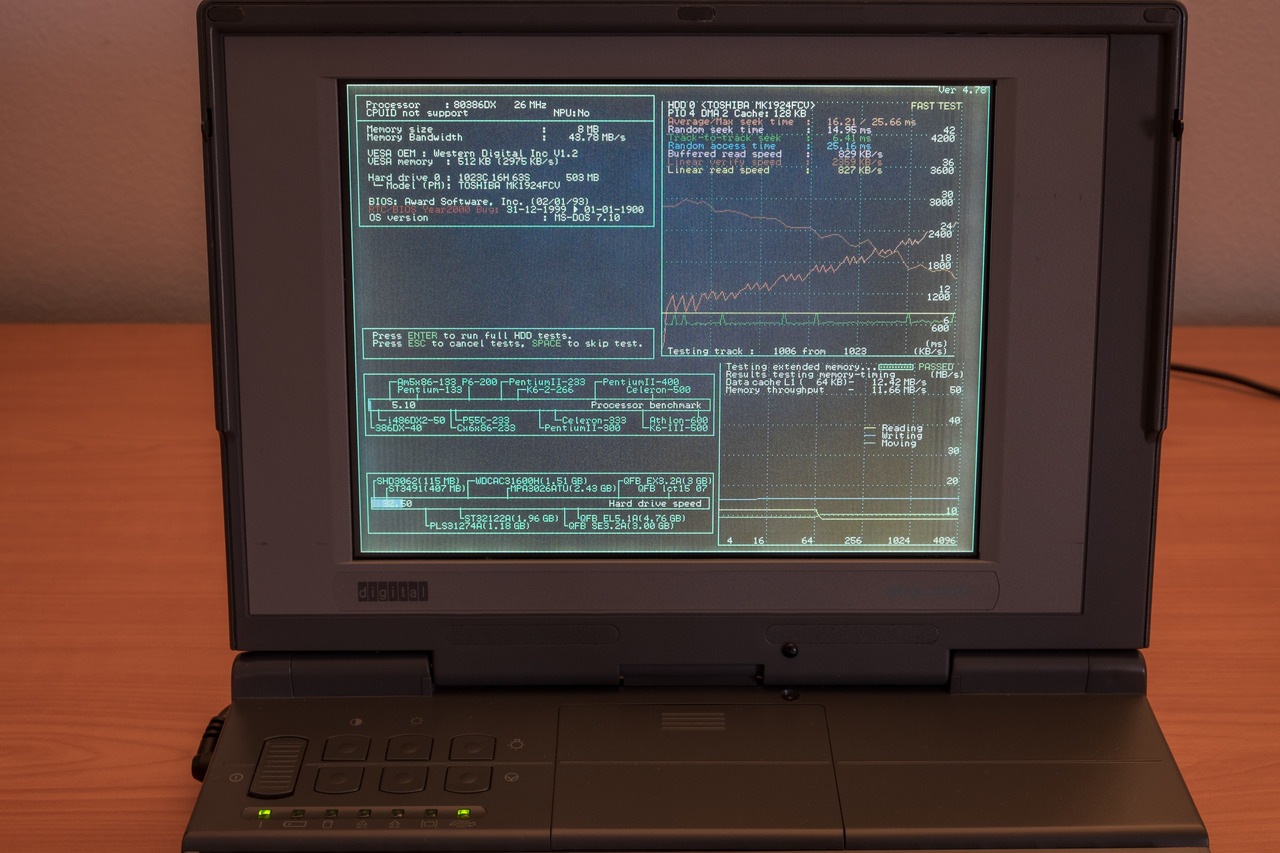
The other devices that we showed were: Apple PowerBook 100 (this year with a working hard drive and full of software), Digital DECpc 325SLC (because a 386 with color LCD is cool) and HP OmniBook 900 (just a service laptop to convert the Wi-Fi Internet into a cable form for the Indy).
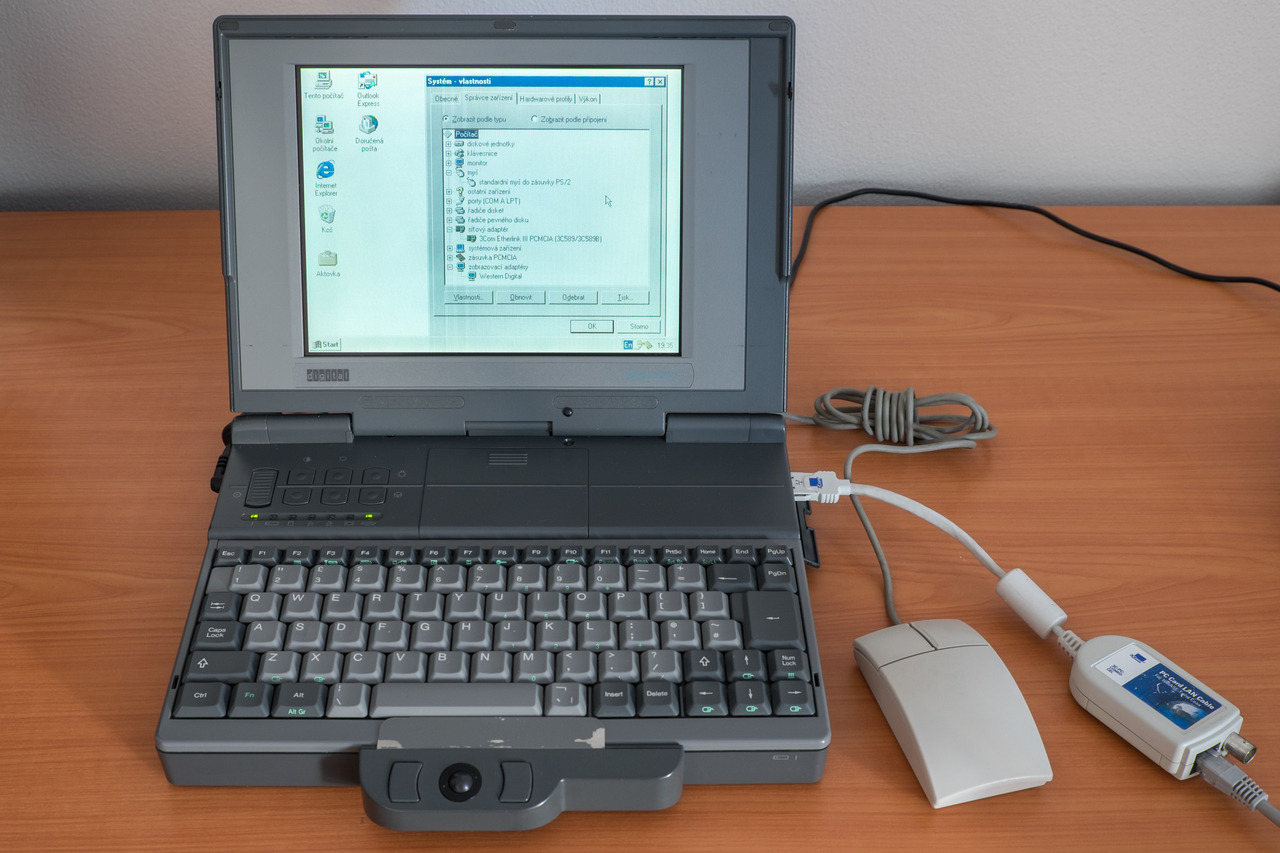
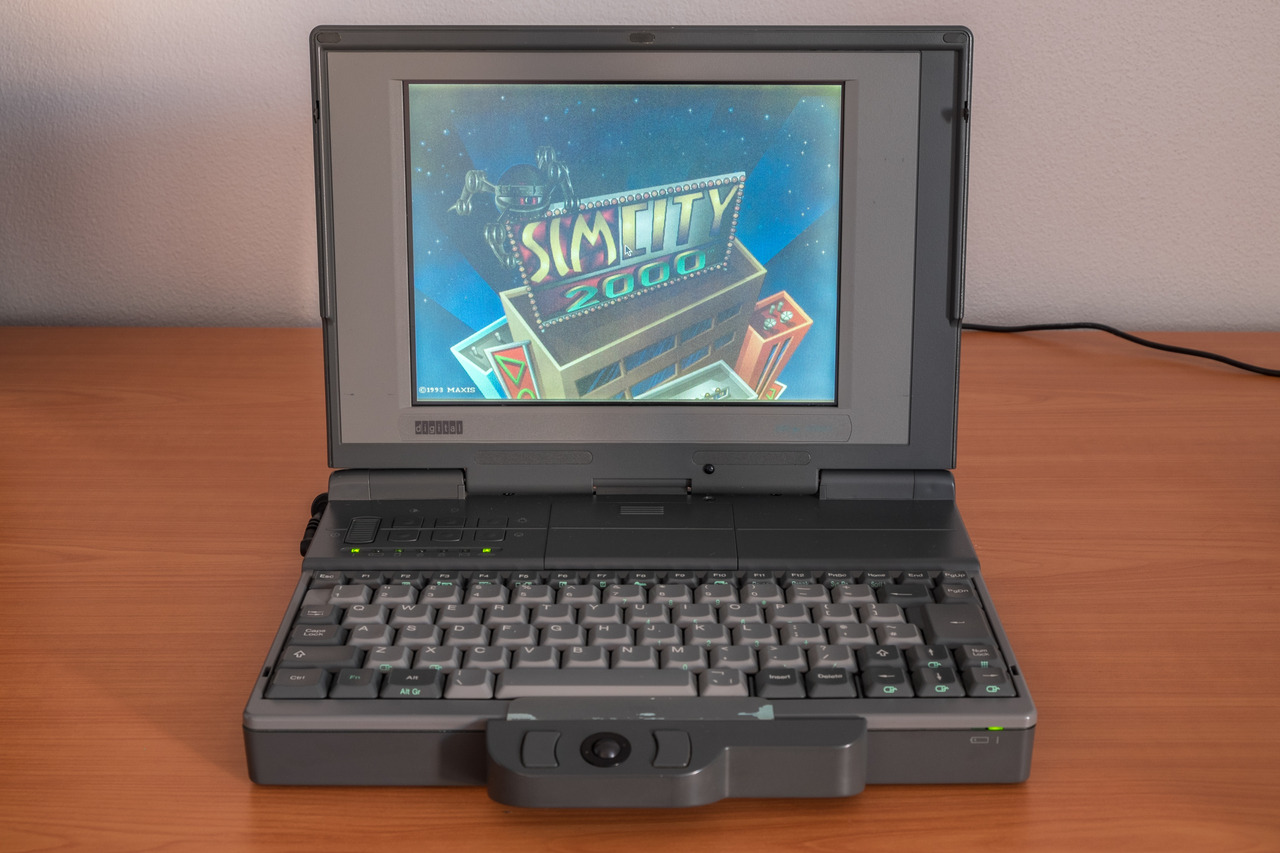
Digital (DEC) always made interesting computers and their PC laptops were no exception. DECpc 325SLC was a laptop with the first generation of color passive-matrix displays. The picture quality (aside the ability to display colors) was on par with monochrome passive-matrix screens with all the drawbacks they had. On the other side, the computer was equipped with a 25-MHz Intel 386SL and SVGA graphics for just $2.100 – the price where other laptops from most other brands have just monochrome screens and VGA graphics.
The 386SL is the first CPU specifically designed by Intel for use in laptops. It integrates almost a whole PC into two chips, with the main chip containing (among other things) a 386SX core (with 16-bit data bus) and 64kB of cache (16-bit as well). Intel built the platform to support then new power management functions like the sleep mode (“suspend to RAM”). The performance of this CPU is halfway between 386SX and 386DX.
Graphics chip was not integrated in the two Intel chips. Digital decided to use a chip from Western Digital with 512kB of video memory and the support for 256 colors with a resolution up to 800×600. The chip was attached using the ISA bus and had no acceleration. On the other side, the support for VESA VBE 1.2 and ~3MB/s throughput to video memory made it a good mainstream solution among ISA based cards of the time.
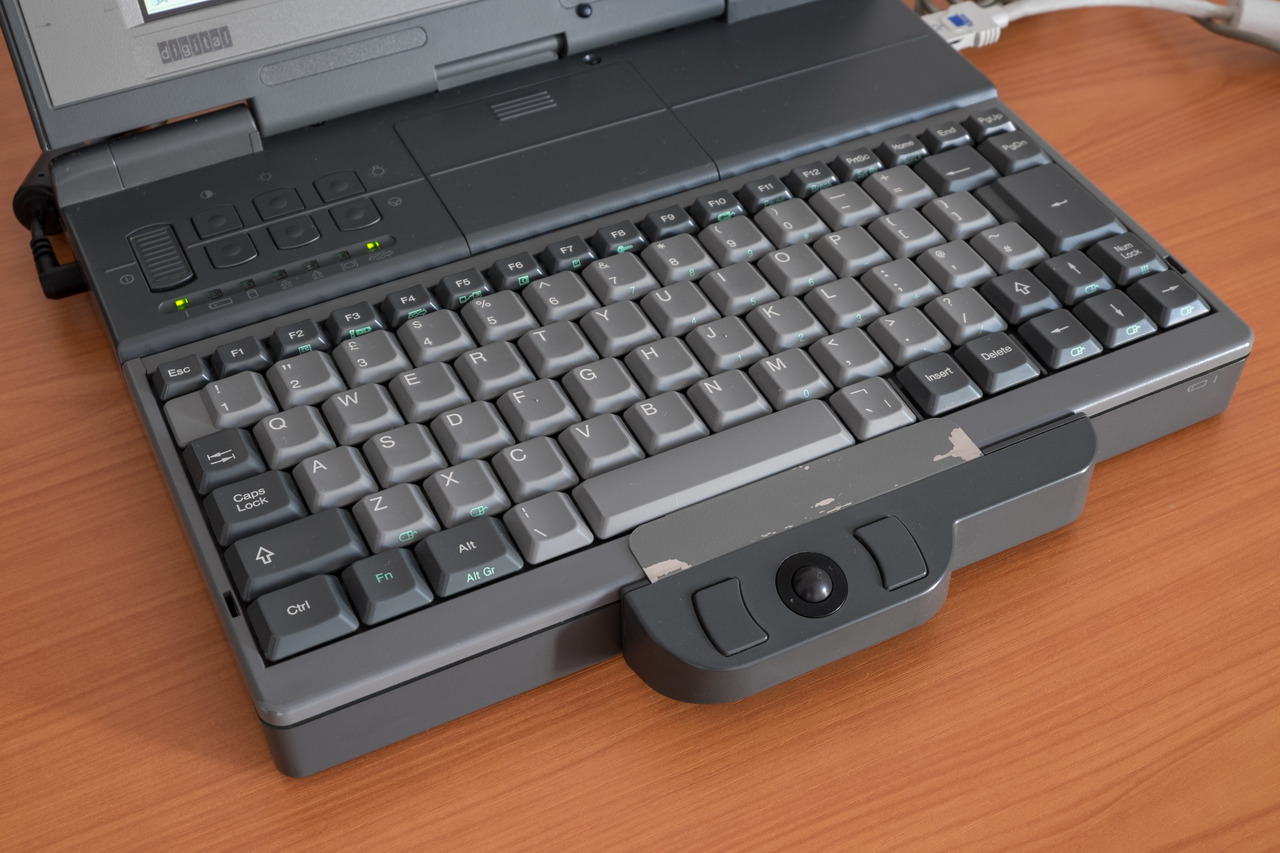
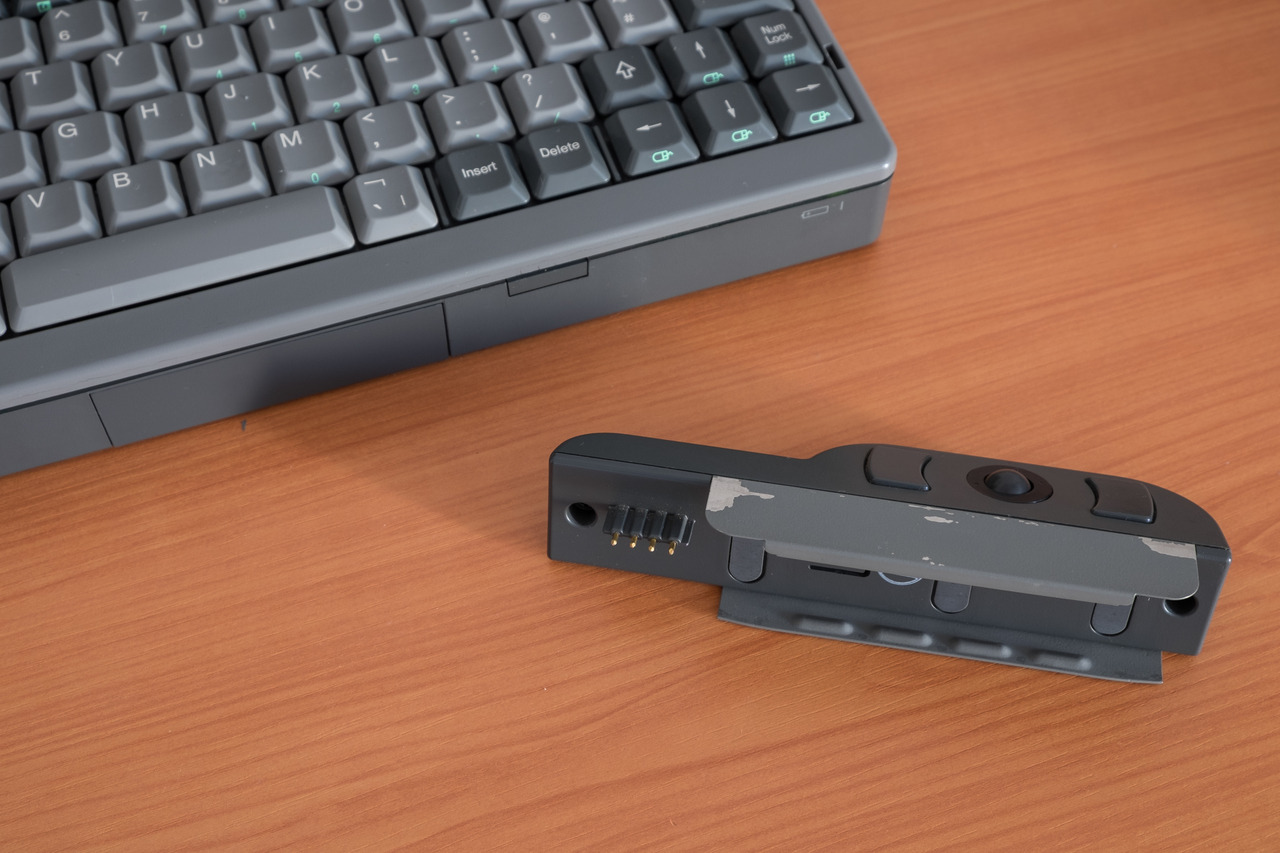
There was also a detachable trackball module available for the computer. It’s not hot-plug and you need to reboot the system, but it works surprisingly well even after decades. Note the mouse icons on the arrow keys and Z/X – these are for the mouse emulation. The laptop with no trackball or mouse attached transparently emulates PS/2 mouse on these keys and the result is way more usable than the Windows feature called “MouseKeys”.
I’m still preparing my computers for the upcoming Bytefest. Amiga 2000 with a A2088XT PC emulator card is the second computer I want to have there. Unlike others, I want to show the computer with Kickstart 1.3 / Workbench 1.3, original upgrades and late-80s programs.
I often see only heavily expanded Amiga systems with latest versions of Workbench, PowerPC accelerators and PCI cards. However, these machines don’t say much about this platform when it was really used by professionals.
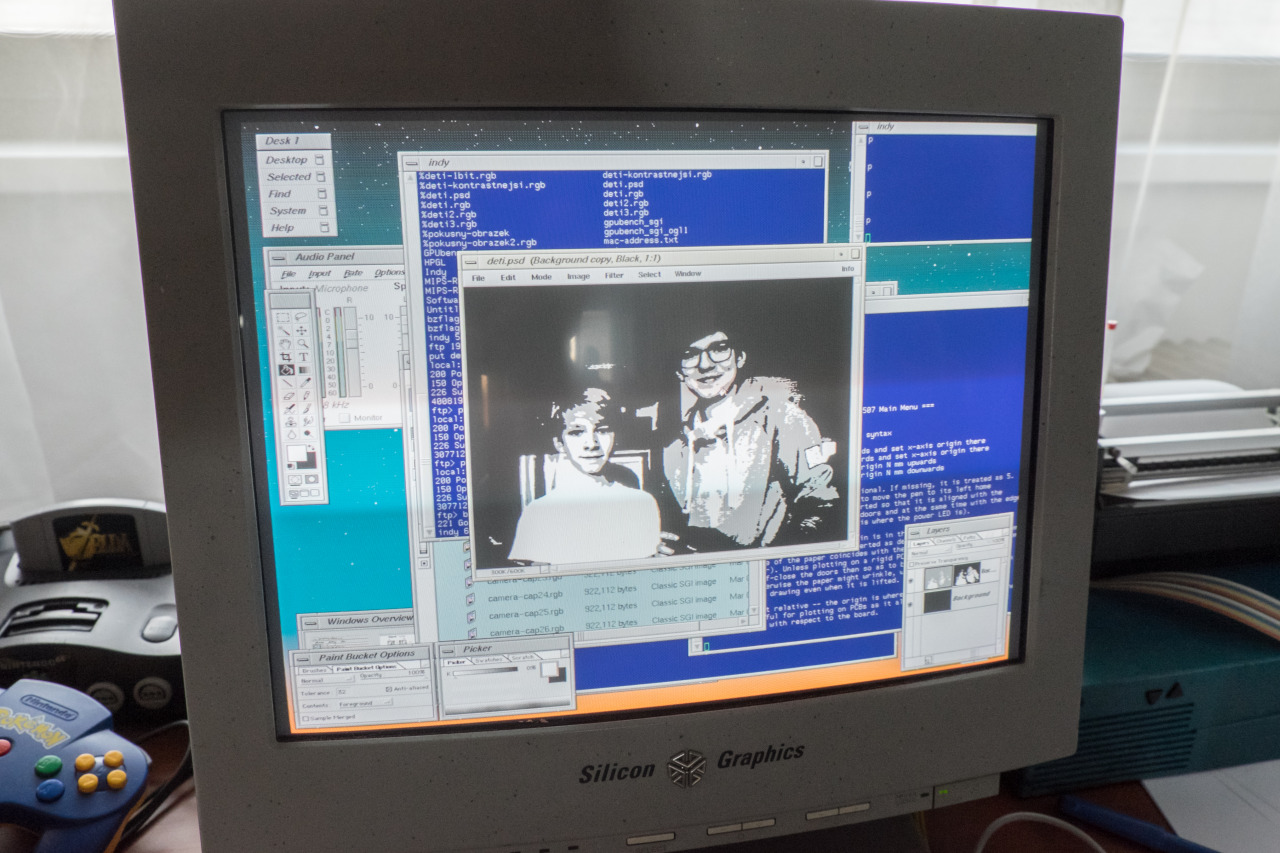
Bytefest 2019 is coming and I have only two weeks to prepare all the machines I want to take with me. I want to the show this Indy with a Nintendo 64 game console because Indys were often used for N64 game development (after all, N64 hardware was designed by SGI). It is nice to see that Indy’s VINO interface supports progressive scanning (used by game consoles and old 8bit computers) on its composite/S-Video inputs – unlike newer SGI O2 and SGI Visual Workstation 320. Anyway, the main planned part is to connect a vintage Czechoslovakia plotter (Aritma Minigraf) using our custom interface (modified to use a serial port) and plot processed images of visitors taken using the Indy’s bundled webcam.
I’m surprised that serial ports on Indy support speeds only up to 38.4 kb/s. Pretty slow for a computer introduced in 1993. Maybe that’s one of the reasons why the serial port speed was not even mentioned in the user guide. They just didn’t care.