This site finally goes online. It took me months of very occasional work to create it, and write at least a few topics (more to come soon – a long article about the SGI IrisVision is almost complete). The currently available topics include:
Do not expect me to publish many articles a month. This page should be my place for more quality content about vintage computers, including information not covered anywhere else (or not as in-depth).
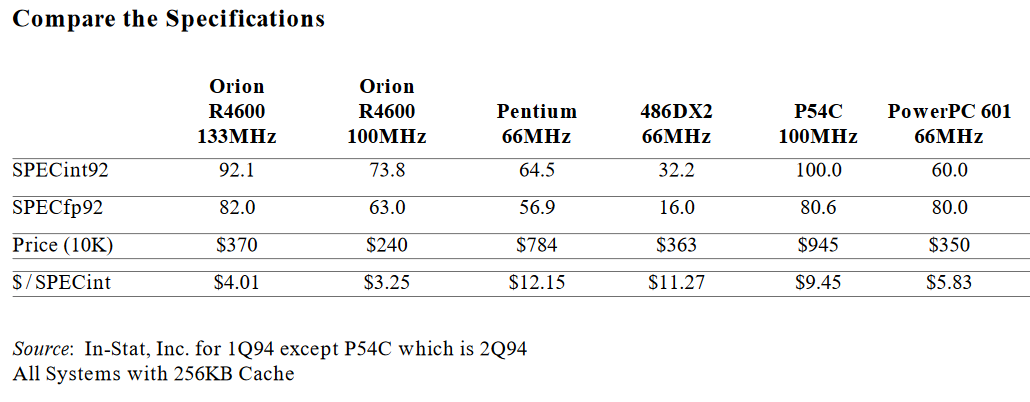
In the mid-1990s, there were so many articles about how cheap all the RISC CPUs were compared to what Intel offered. You could read it in an every computer-related magazine every month. Scientist friends of mine at universities desperately wanted to have such RISC CPUs in their own personal computers. They never really liked x86 design and they were used to work on UNIX workstations, so they didn’t even need any support for running Windows. However, although these CPUs were marketed as inexpensive, it was nearly impossible to build a computer based on them. You could only buy a complete UNIX workstation or a hi-end workstation-class mainboard with a lot of unnecessary features. There was no way to buy a reasonably priced basic mainboard.
At least that was the situation here in Central Europe. What was your experience? Was it different in your country?
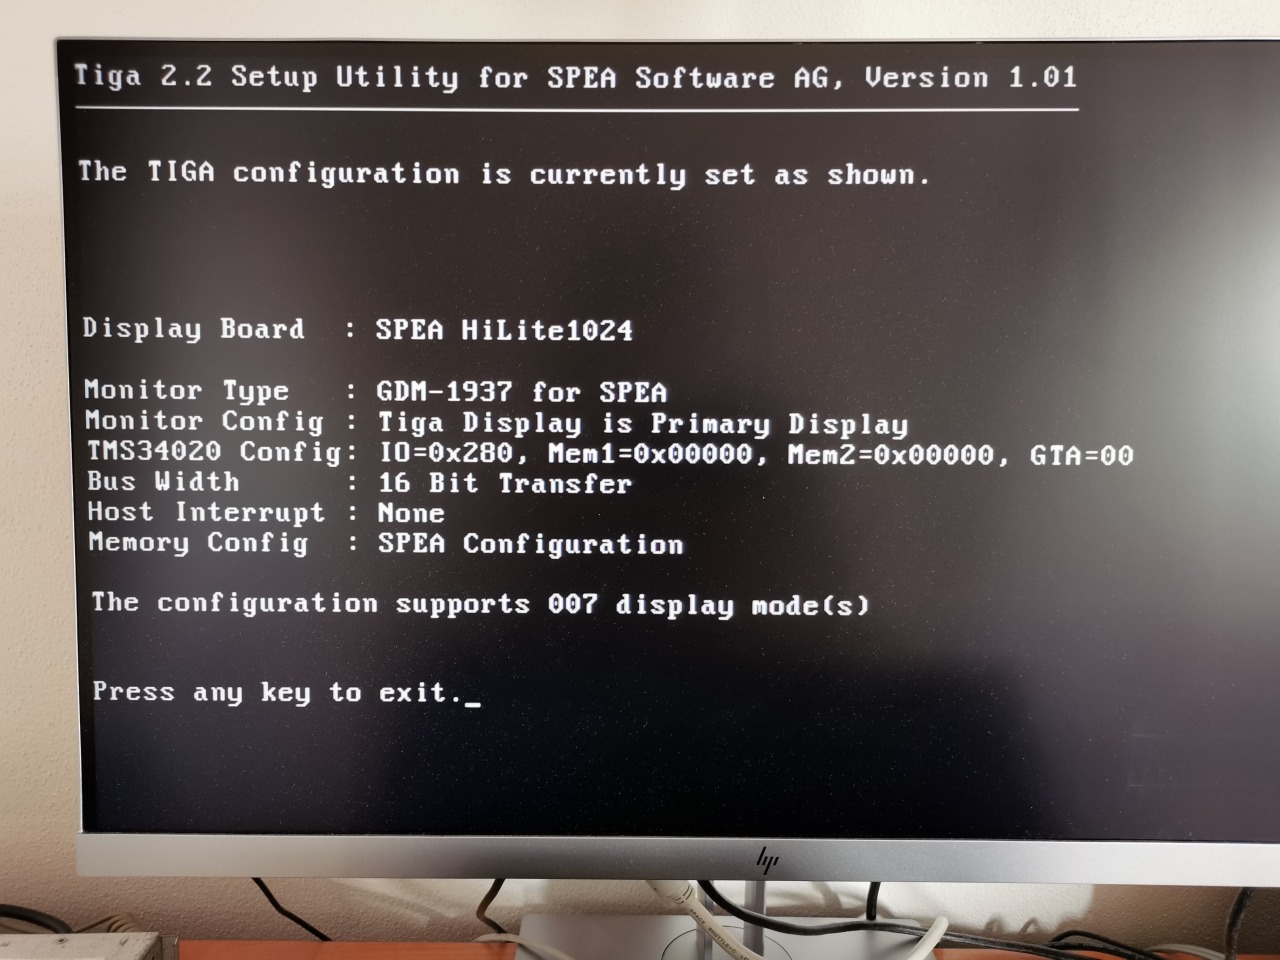
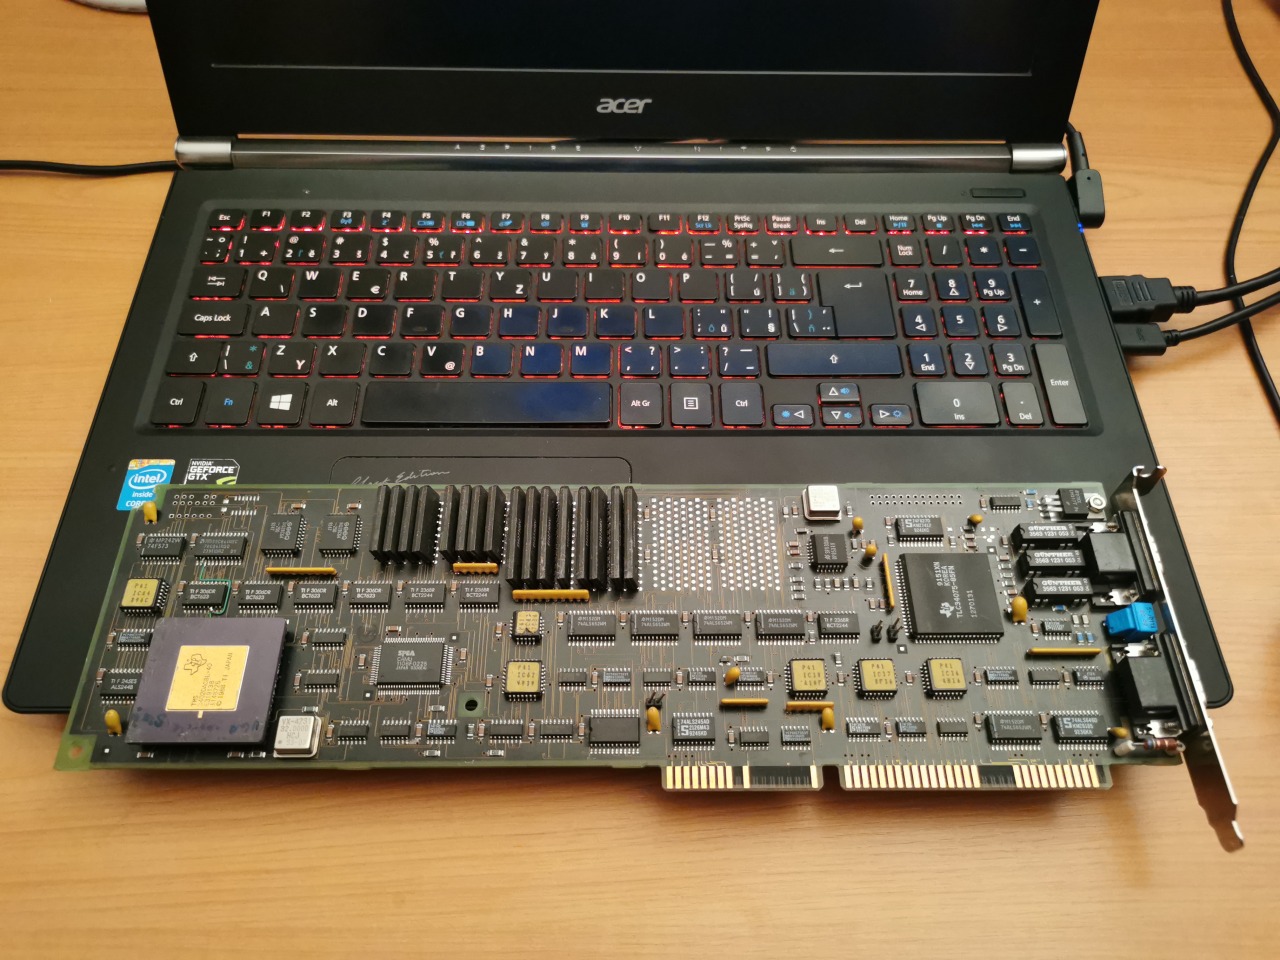
TIGA is a strange beast. Texas Instrument’s TMS34020 (introduced in 1990) was the holy grail of 2D graphics acceleration for a certain period in the world of PCs. This chip is fully programable general purpose processor, so you can offload even non-graphics tasks to it (my low-cost SPEA Graphiti HiLite 1024 has 1MB of program/data memory in addition to 1MB of framebuffer memory). If you add a floating-point coprocessor (like Intel i860 or TMS34082), you can create a 3D accelerator that processes both rasterization and geometry processing.
On the other side, fixed-function graphics cards soon became cheaper and faster, which took the mass-market appeal away from TIGA. There were also multiple reasons, why TIGA was not a user-friendly standard. Unlike CGA, EGA and VGA, TIGA has a vendor specific part of the graphics driver. That means that you cannot just put a TIGA card in your computer and hope that programs or operating systems listing TIGA among supported graphics standards will work. That’s the reason why most TIGA collectors not even try if their cards are in a working condition.
This SPEA card (like many other TIGAs) is supported in DOS and Windows 3.x only. You need to configure the card (the configuration is stored in its EEPROM), initialize it during every boot using a vendor specific driver and load a generic TIGA library. Once all the steps are done, you can run any TIGA-enabled program.
This approach means that there cannot be any generic TIGA driver for UNIX, Linux, Windows NT and other operating systems that cannot work with drivers loaded from DOS. Windows 3.x has a generic TIGA driver and one can be installed also in Windows 95, but that’s all.
SPEA didn’t bank on the generic TIGA support in programs. They provided “direct” drivers for multiple DOS CAD programs (including AutoCAD) and Windows 3.1. These drivers work only on compatible SPEA cards and bypass all TIGA libraries. SPEA made them more performance optimized for CAD work. The Windows driver also offers an easy way to change resolution and color depth. Only 256-color (8-bit) and true color (32-bit) modes are supported, so my entry-level board with just 1MB of framebuffer memory can show millions of colors in resolutions no higher than 640×400.
(The first photo shows the SPEA card compared to a standard “dumb” ISA SVGA card. This SVGA card is one of the best choices from the early 90s thanks to its fast Tseng ET4000AX chip and 1MB of 32-bit video memory.)
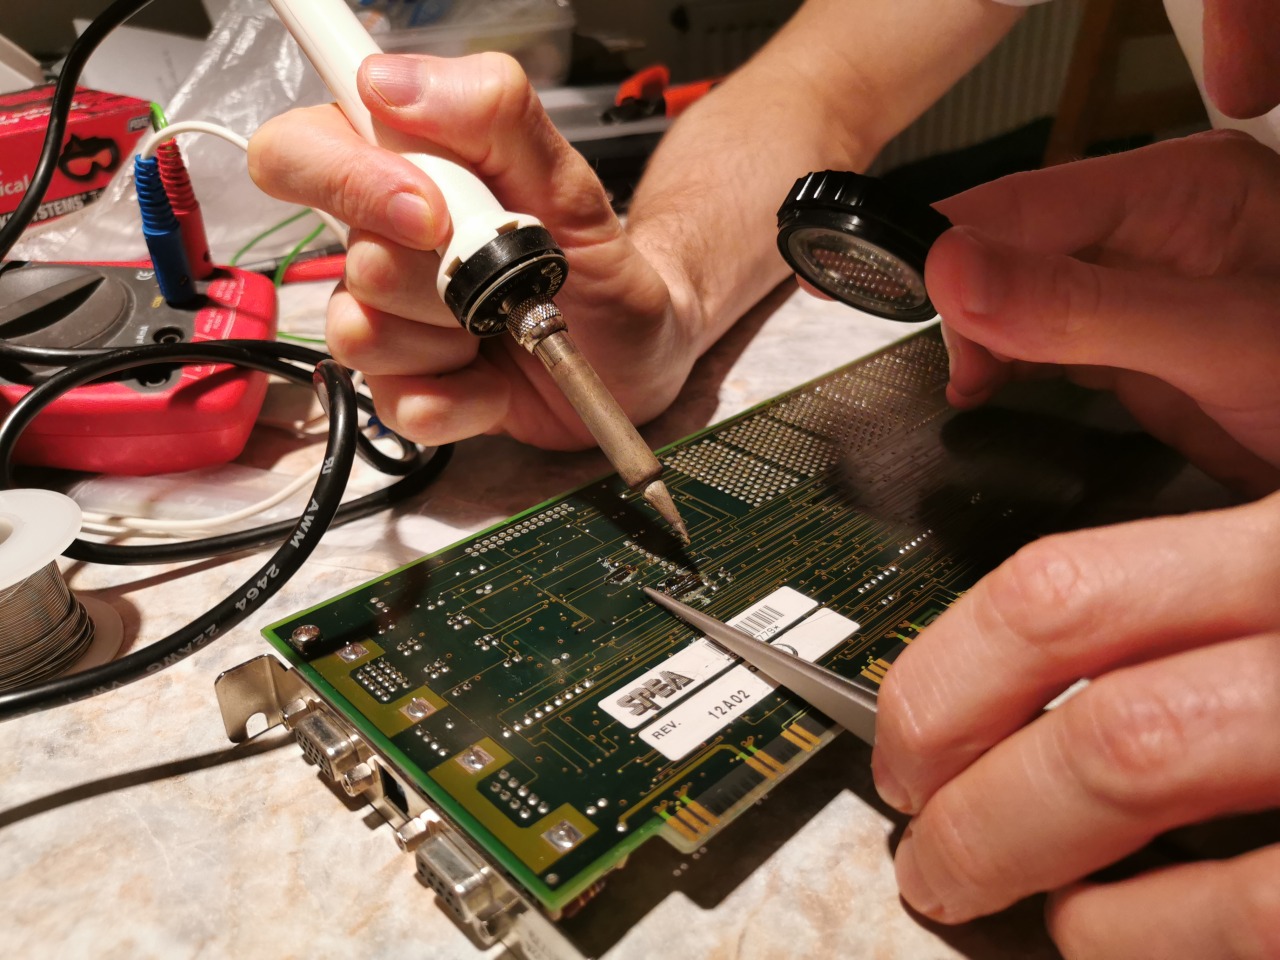
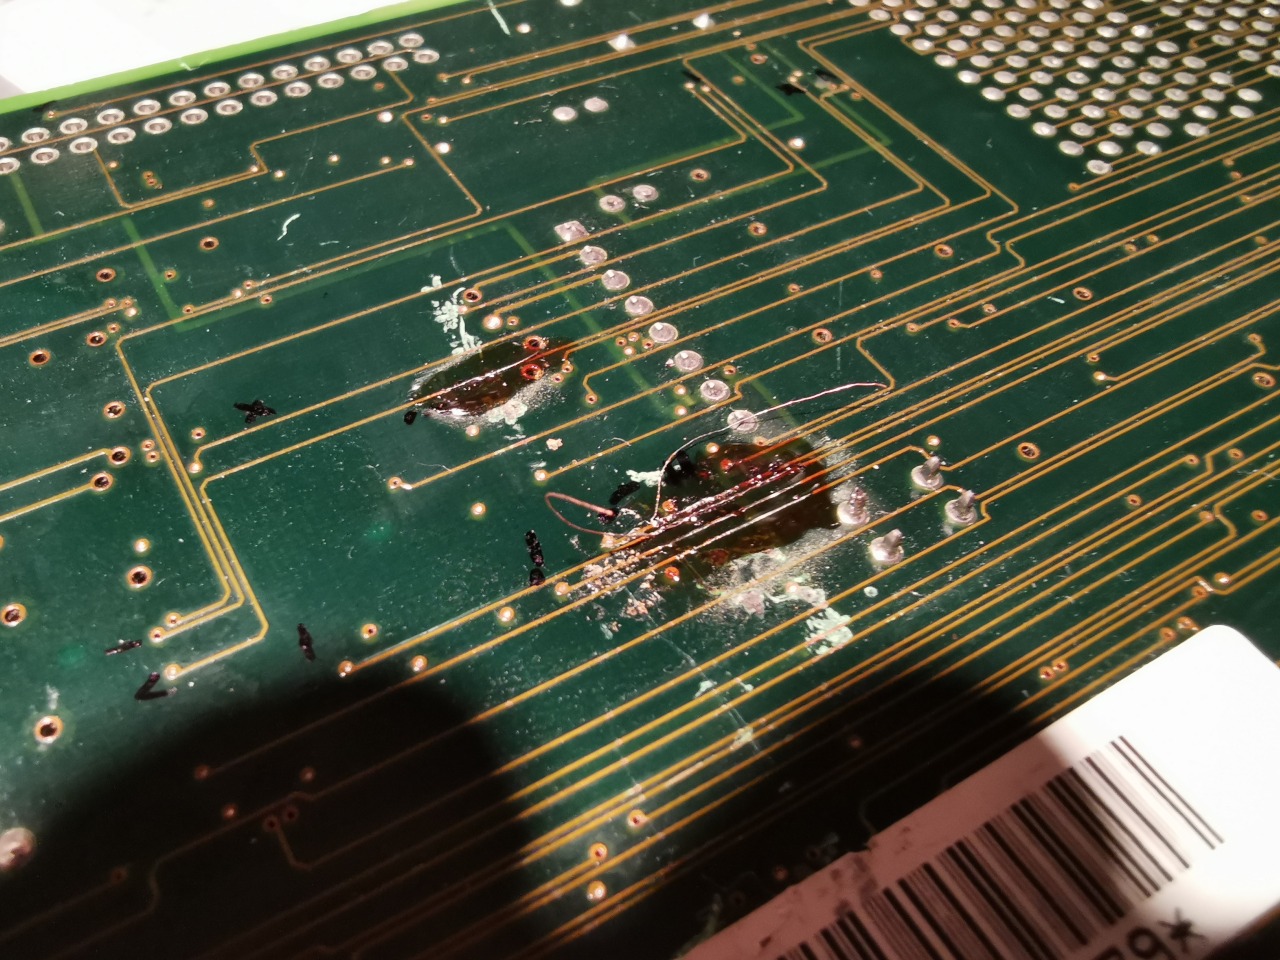
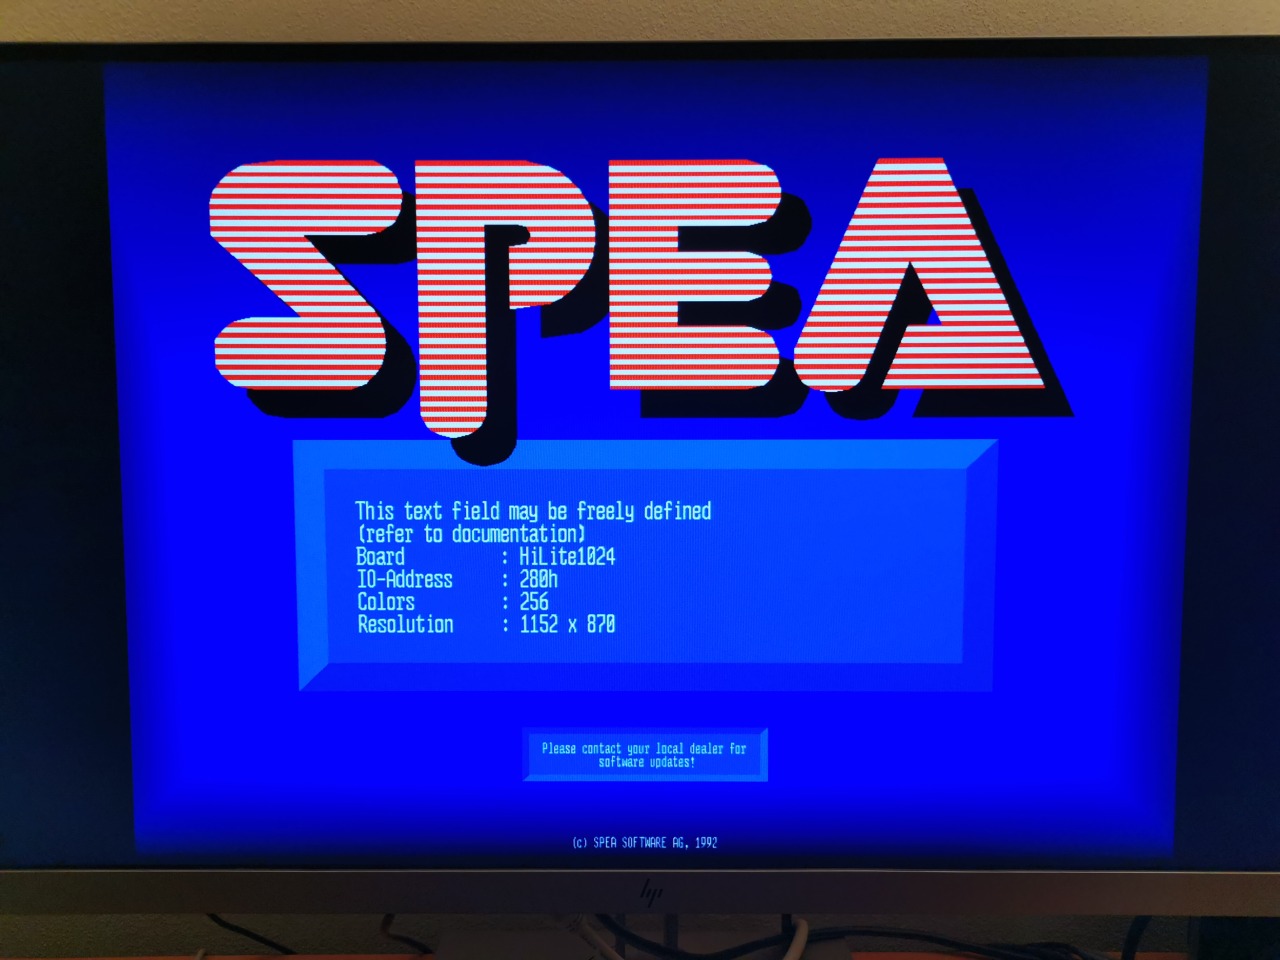
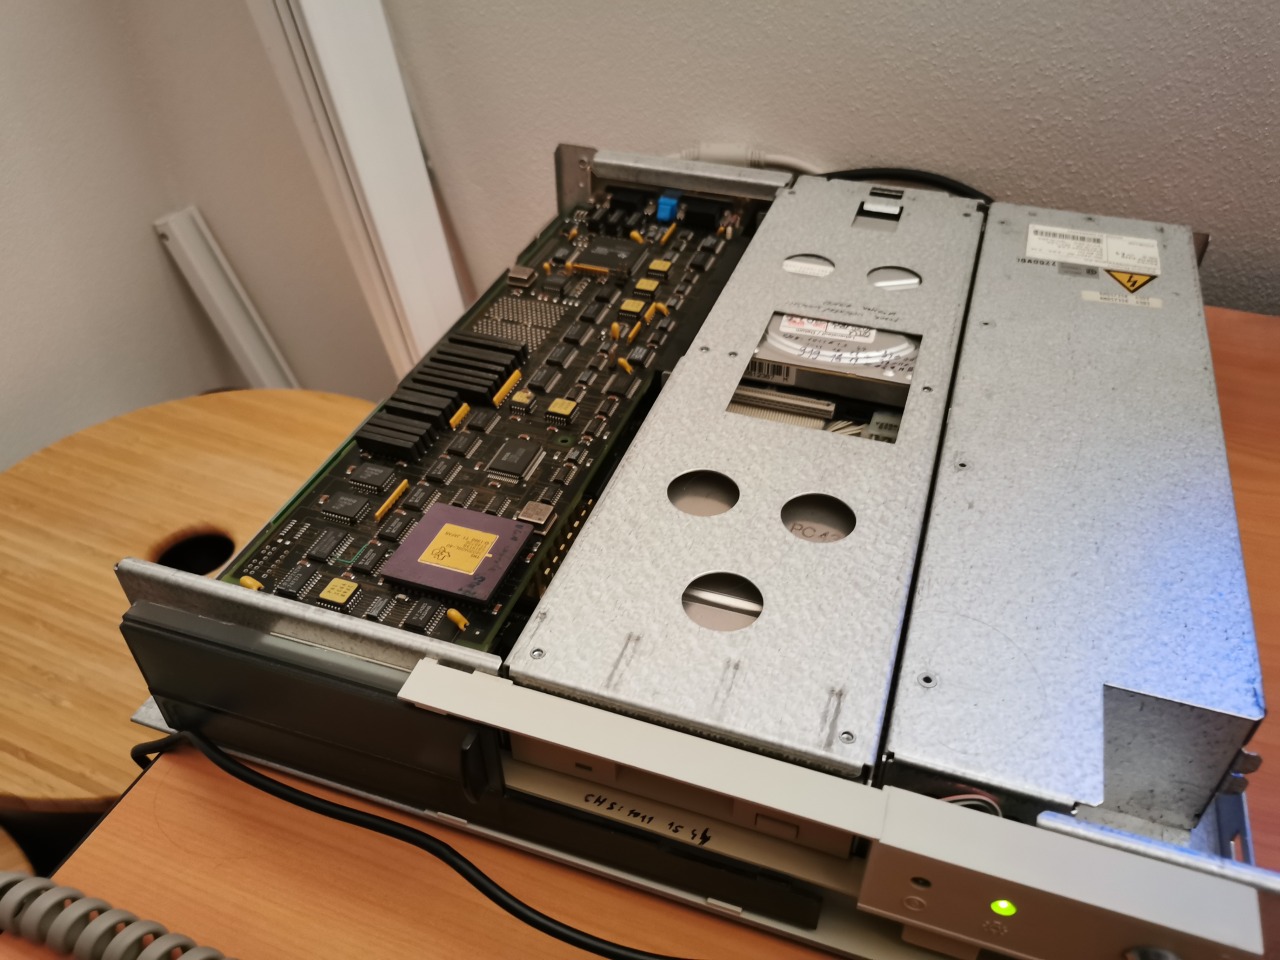
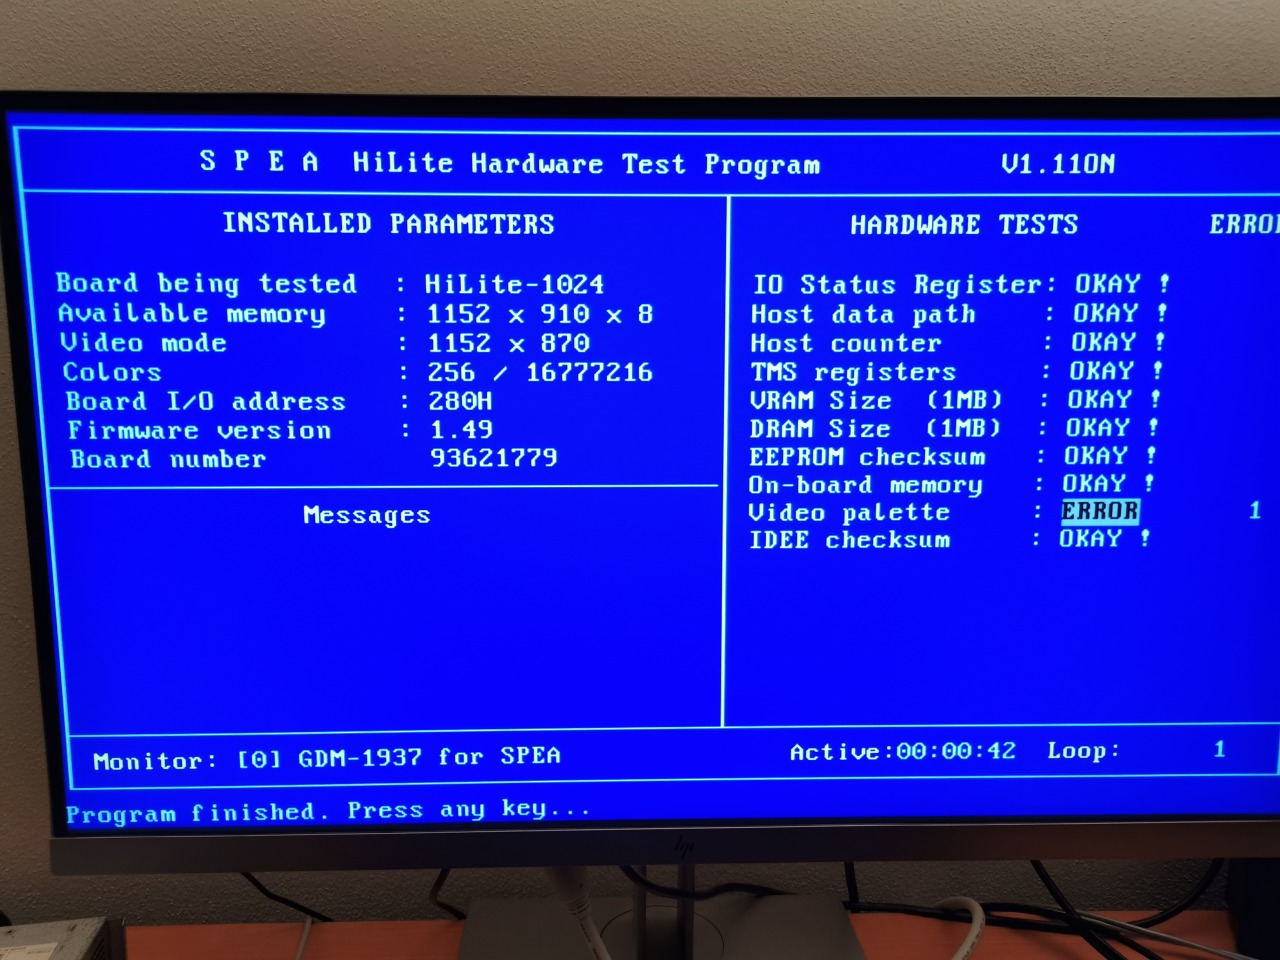
Our SPEA Graphiti HiLite 1024 2D graphics accelerator finally works. The repair was faster than expected – it took less than an hour. We just fixed the broken traces between the GPU and RAMDAC and that was it. The card outputs very sharp workstation-quality image even in 1152×870 and 256 colors. We are one step further to start programing it.
I recently mentioned PCMCIA linear memory cards (both SRAM and flash) that existed before PCMCIA controllers started to support IO devices and ATA. I used such an SRAM card in my Olivetti Quaderno subnotebook instead of its failed hard drive. Quaderno boots DOS from the internal ROM, loads a driver to support SRAM and allows using it as an additional drive. However, there were also laptops that supported booting from PCMCIA cards, and I am surprised that this feature was not uncommon.
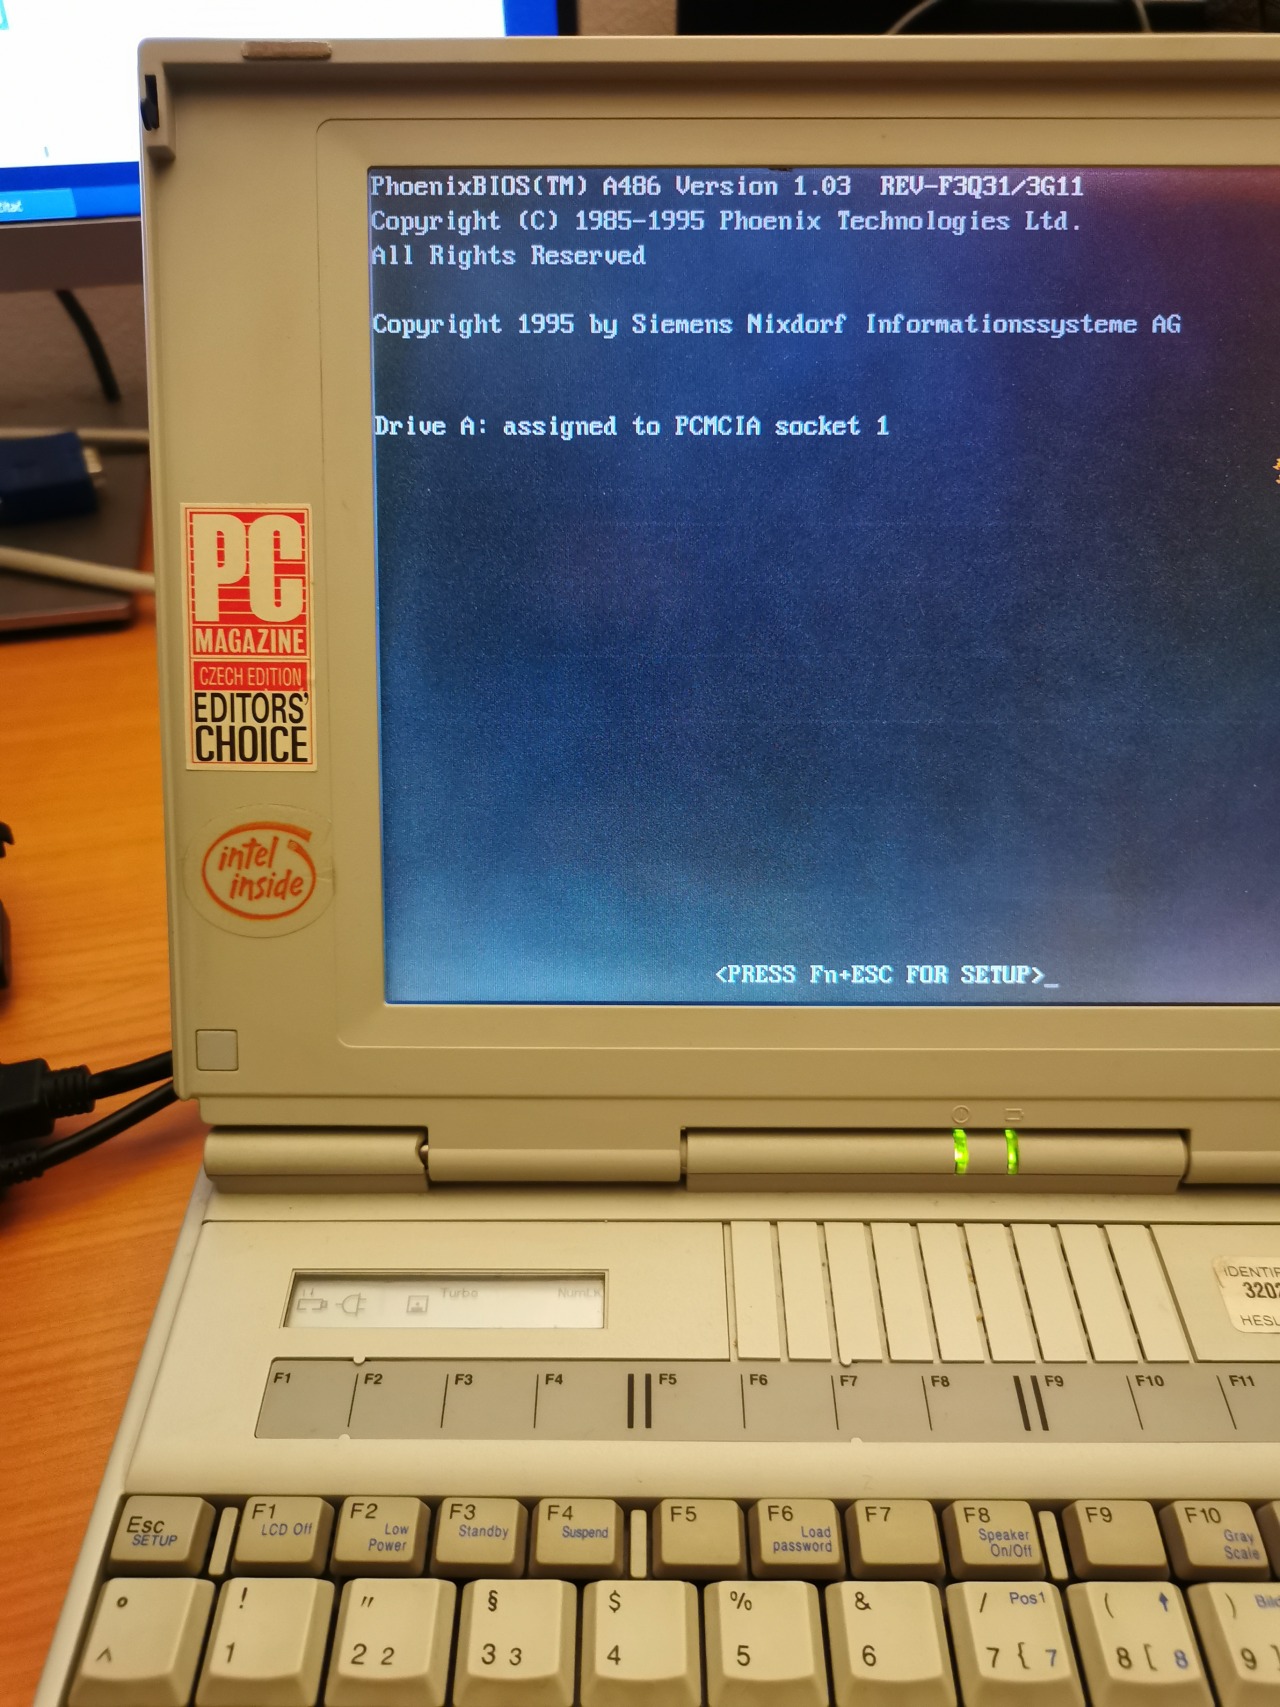
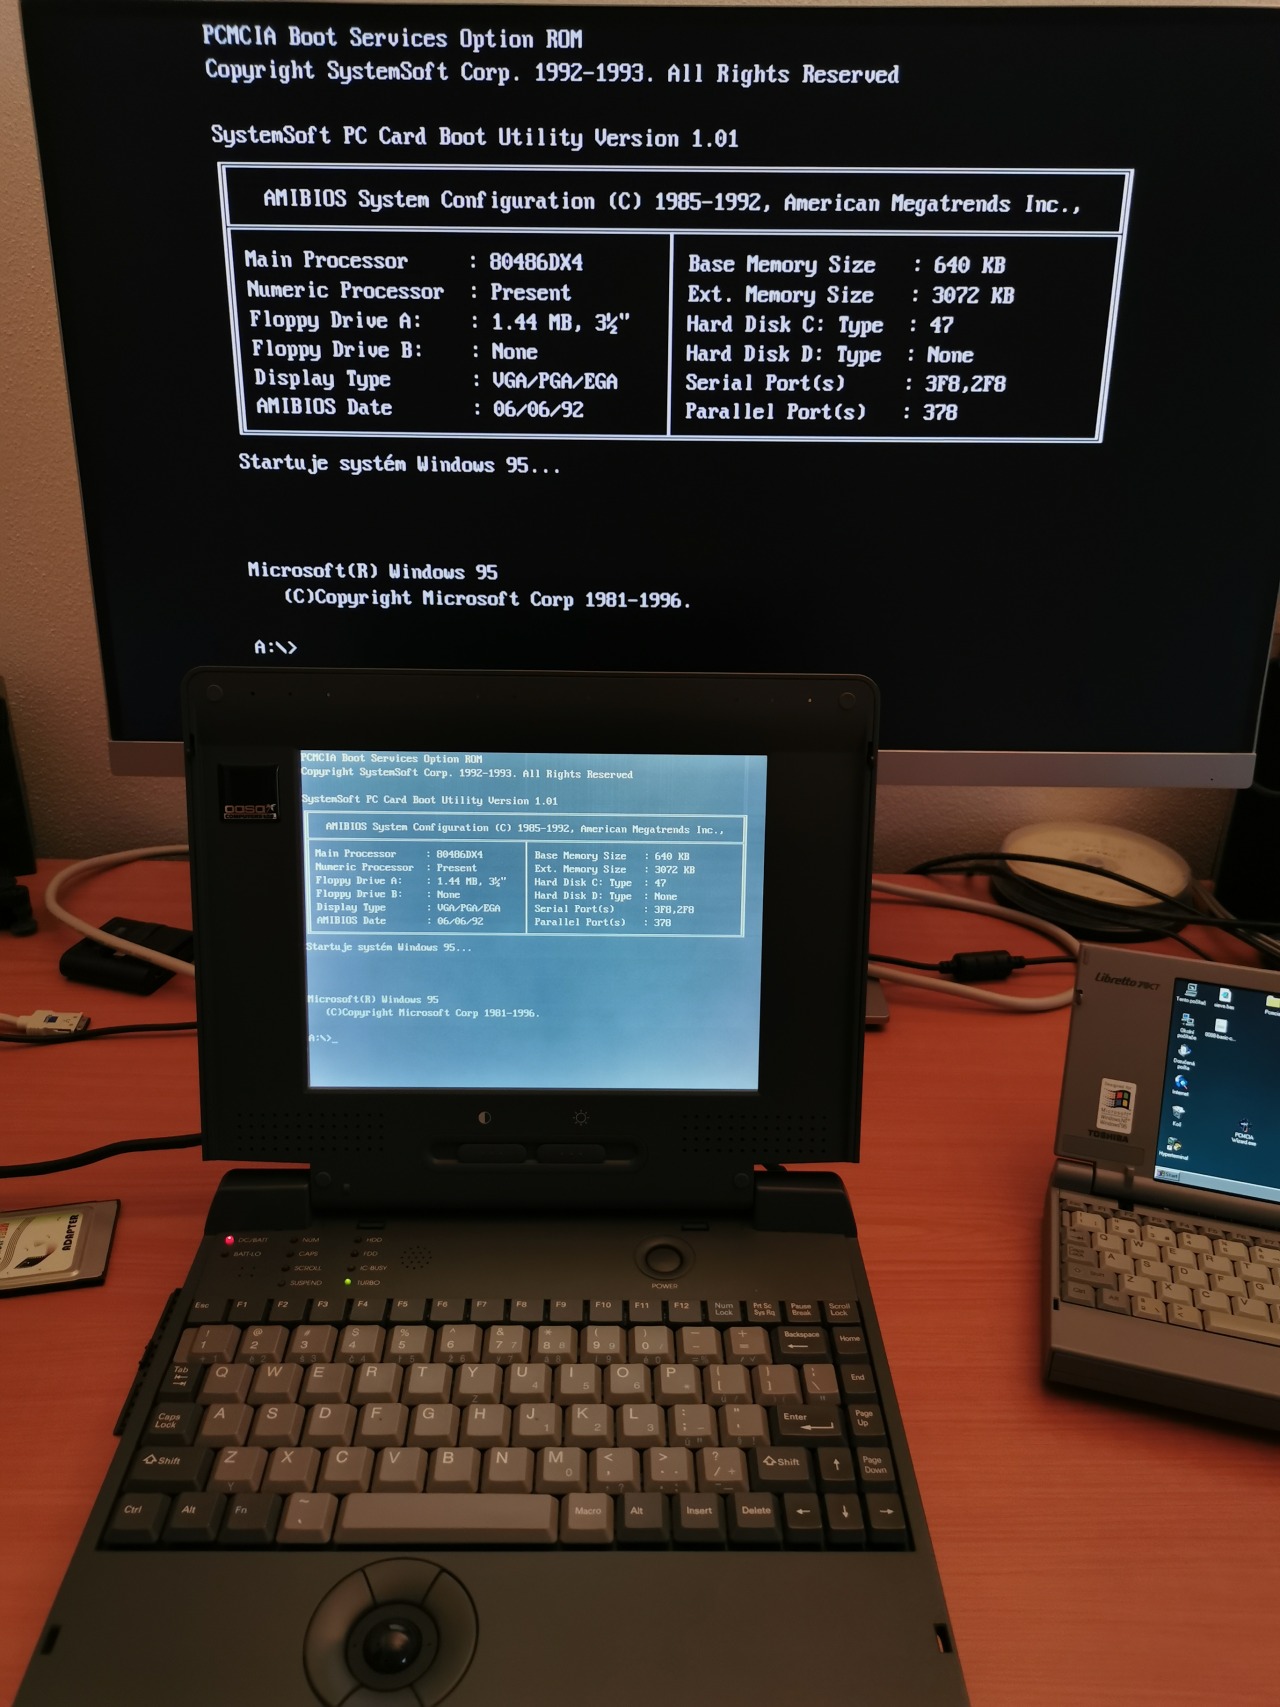
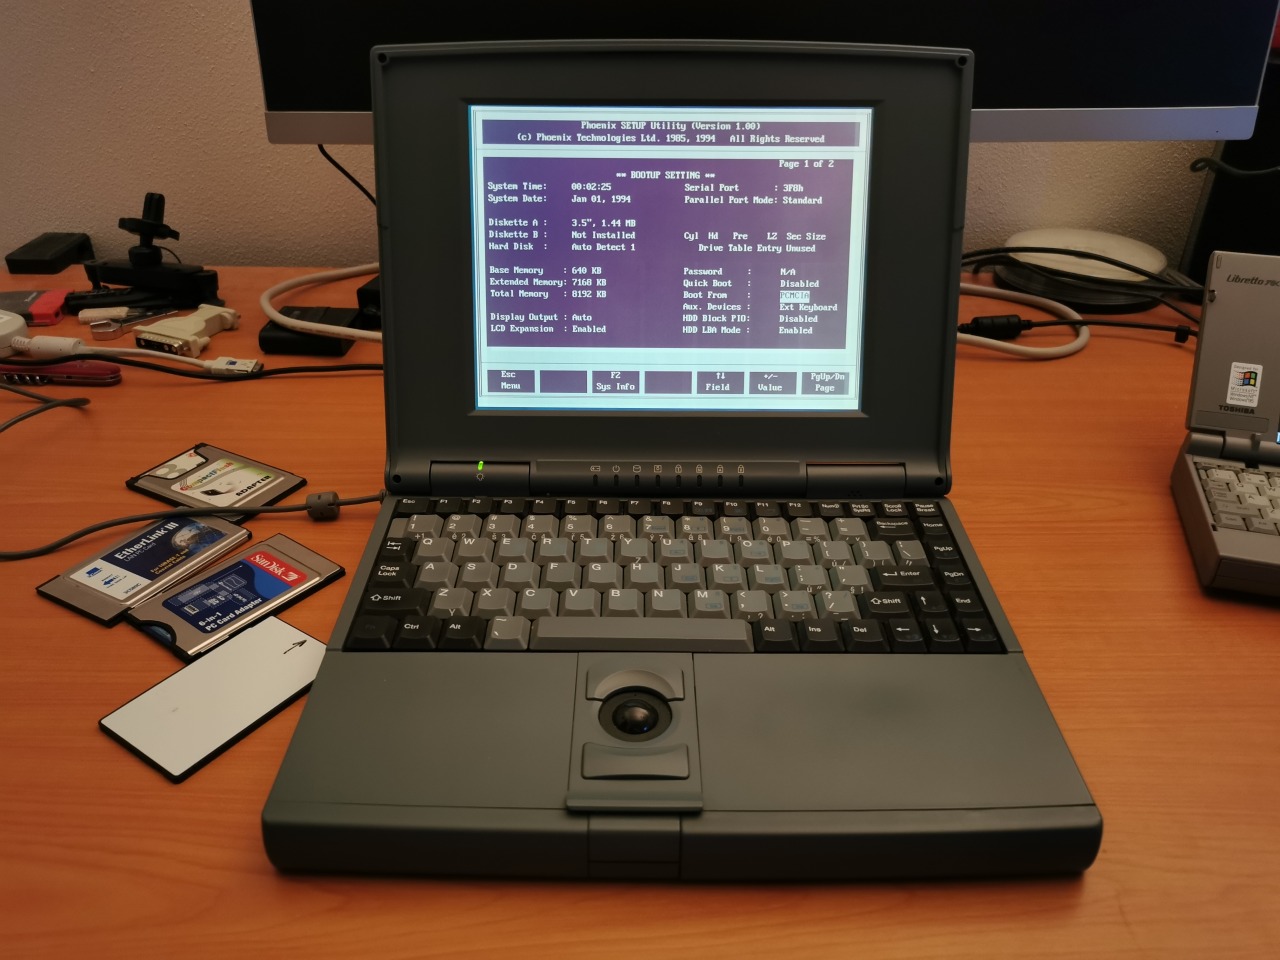
Certain 386/486 laptops with Phoenix BIOS have “PCMCIA” in the boot device list (in addition to “hard drive” and “floppy drive”). These support just linear flash/SRAM cards and let you boot DOS out of the card mapped as A:. Everything works just fine and you don’t need to load any PCMCIA driver. ATA PCMCIA and CompactFlash drives are not supported here – they are ignored by the BIOS module.
The laptop with AMI BIOS could have an optional “PCMCIA Boot Function” module. Once it was enabled and a card was inserted, the system booted from PCMCIA and mapped the card again as A:. However, the support was flaky – just good enough to load a proper PCMCIA driver during OS boot.
Laptops from large brands (like Toshiba) mostly didn’t support this feature. ThinkPads were an exception (486 and maybe also early Pentium ones). According to some owners, they even supported booting from ATA/CF cards. However, ThinkPads as well as the laptops with Phoenix and AMI software did not provide a driver-less access to PCMCIA cards if a user booted from a different device. It seems that there is only one known laptop that supported this – MiTAC 4022.
Replacing a dead CMOS battery in a Dallas NVRAM/clock chip without using proper tools. This was for our precious Silicon Graphics Inc. Indy UNIX workstation.
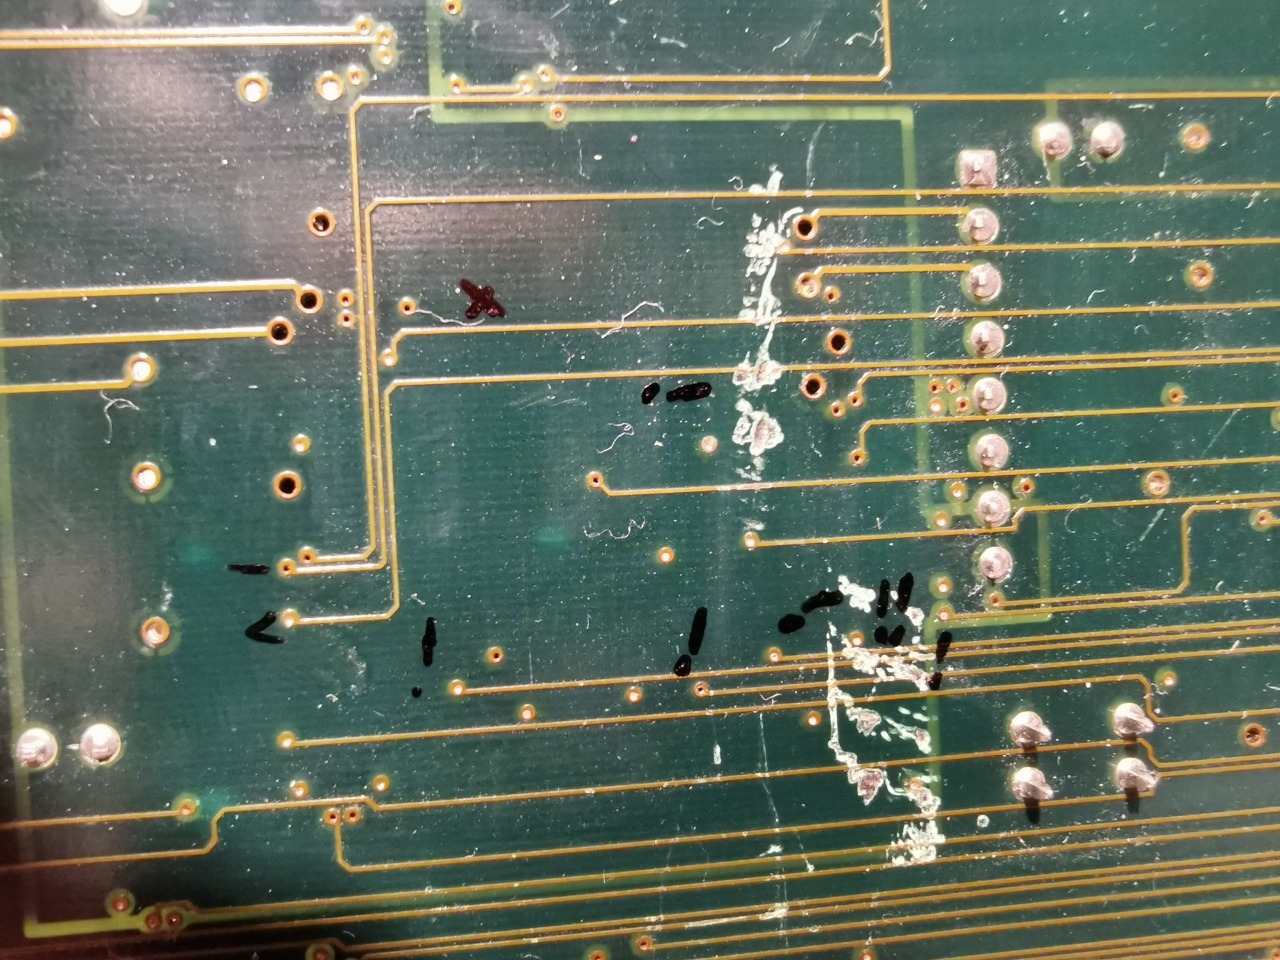
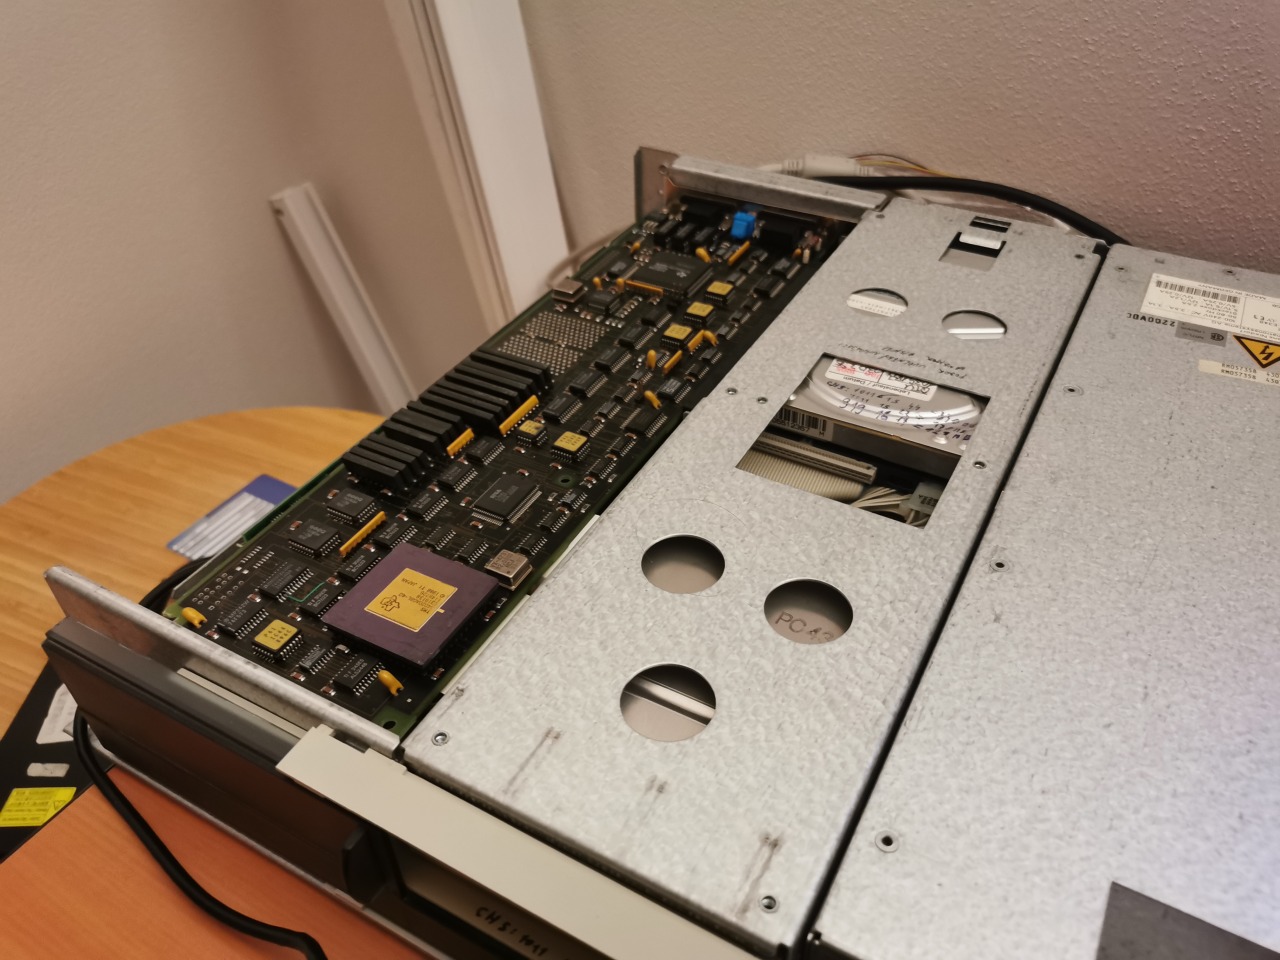
This is my new project for next few months – SPEA Graphiti HiLite 1024 – a TI TMS34020-based professional CAD card (“TIGA”). The video output does not work properly as some traces between the GPU and RAMDAC are bad, but the rest of the card seems to be ok. Once I fix it, I would like to play with the chip and program some benchmarks to see the real performance. It looks like TIGA cards are valuable among collectors, but there is very little info about what can be done with them. TMS340x0 chips are fully programable 32-bit integer CPUs and this (rather low-end) card has 1MB of program/data memory (in addition to 1MB of framebuffer memory). It is like a complete computer on a card.
These chips were used in the graphics subsystem of Sun 386i UNIX workstation and some CRT terminals (like DEC VT1000). There were even Amiga Zorro cards with these chips (boosted with TI floating point co-processors), but presumably the concept was too complicated at the time when most people cared just about BitBlt and basic acceleration of line drawing.
(fortunately, my Siemens Nixdorf PCD-4Lsx PC is just big enough to accommodate one full-size ISA AT card… the card is very picky and refuses to work on Pentium systems or anything with ISA clock beyond ~8MHz)
Although mounting remote HDDs over a serial cable to my Olivetti Quaderno was a nice solution, it was not very fast. I wanted to add persistent storage using a PCMCIA card, but Quaderno has just PCMCIA 1.0. I used to work a lot with PCMCIA, but it was always the newer standard (2.0) typical for 386/486 laptops. PCMCIA 1.0 does not support IO devices (so no ethernet cards) or CompactFlash cards (as they are IO cards in the ATA mode). PCMCIA 1.0 can work only with linear memory mapped cards. For linear flash cards, there were two incompatible standards (FTL and MS FFS). SRAM cards had just a single standard. In addition to all of this, simpler devices (industrial, embedded) required attribute memory on the card in order to work at all (fortunately, this laptop supports full Card Services and does not need it).
I took a 4MB PCMCIA SRAM expansion from my Amiga 600 and put it in Quaderno. The ROMDOS drive contains a Microsoft program called MEMCARD.exe (very similar to FDISK.exe, but for early PCMCIA cards), so I used it to format the card, rebooted the machine and got 4MB of persistent storage (the SRAM card has a battery to retain the data even after removing the card from the computer).
These early PCMCIA cards don’t work in Windows out of the box. However, there is already a DOS driver included in Windows 9x. You just need to add two lines in the config.sys and you can use the SRAM card in a “more modern vintage computer” (it still allows you to use the slot with other cards and use hot-plug features). Btw these direct mapped SRAM cards have one big advantage – they are super-fast.
I know it’s almost 30 years late, but I finally understood, how these old PCMCIA devices work…
You might think that the machine is useless without a working HDD and no floppy drive, but that is not true. Quaderno has a small bootable “ROMDOS” drive with basic system files, COMMAND.COM, a RAMDISK driver (up to 320KB of EMS memory can be used and you still have full 640KB of conventional memory) and Interlink software. This drive is interesting, because it acts like a read-write one. You can edit config.sys and autoexec.bat (the changes are there even after shutdown, if the CMOS battery is ok or AC is connected). You can even copy files there, but if it’s more than a few KB, the system will crash hard (requiring you to reinitialize the ROMDOS).
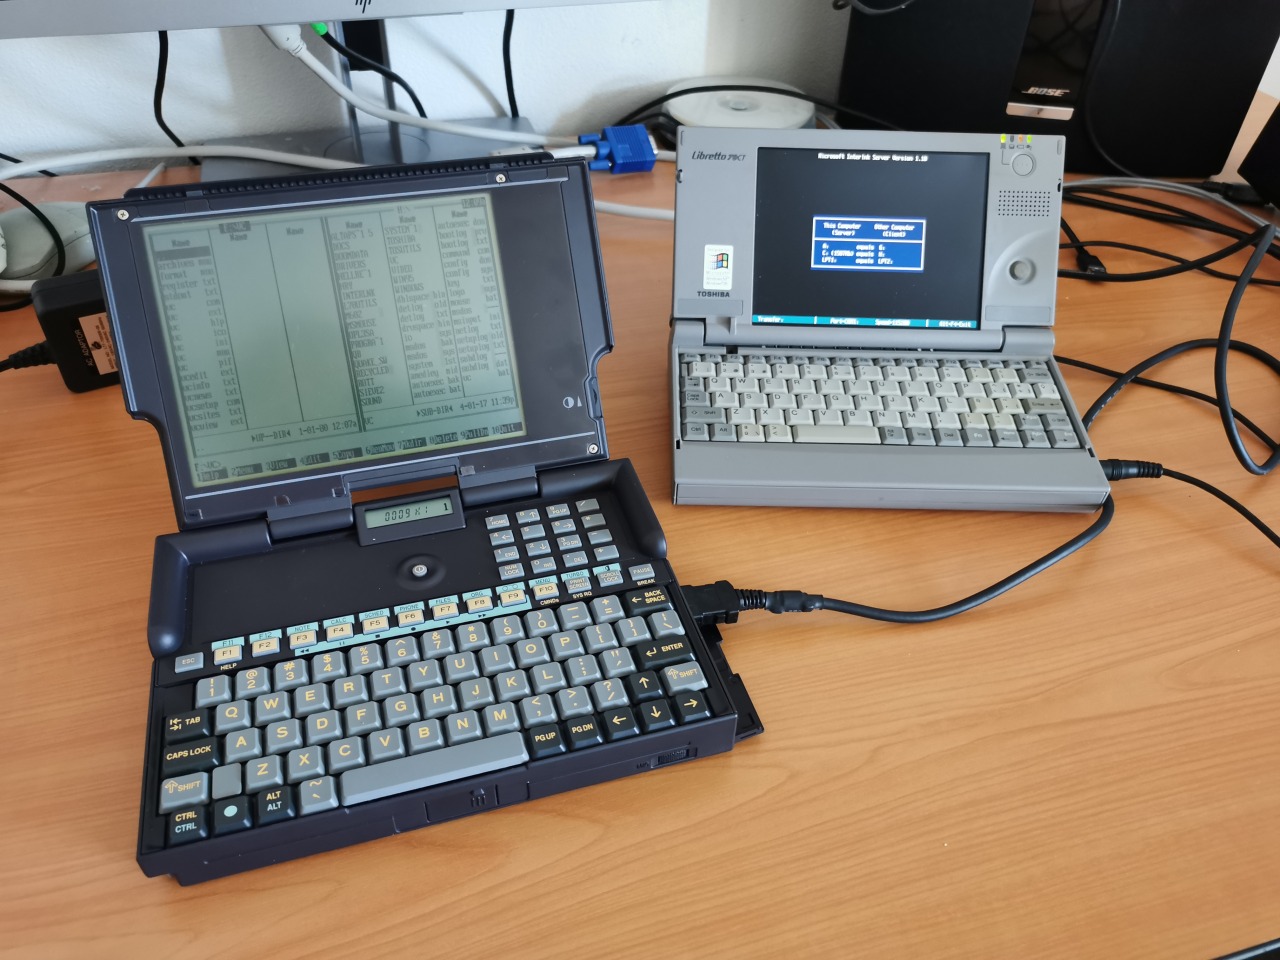
With Interlink, you can mount remote HDDs over a serial port. I used it to run VC (Volkov Commander) to edit the config.sys (no EDIT.COM in ROMDOS) and enable the RAMDISK driver. After this, I had my small but fast local storage (non-persistent) and everything bigger was started directly out of the remote HDD from another computer. This is a good way to test the computer before fixing the HDD or installing a flash/SRAM card in PCMCIA 1.0.